


Curate Your Story: The Ultimate Guide to Crafting a Beautiful Gallery Wall
Defining Your Gallery Wall’s Purpose & Perfect Placement
Before you even think about picking out frames, let’s take a moment to consider the heart of your gallery wall: its purpose and its place. This isn’t just about filling space; it’s about intentional design that elevates your home’s aesthetic and emotional resonance.
First, ask yourself, “What story do I want this wall to tell?” Is it a celebration of family milestones, a collection of beloved travel memories, an ode to your favorite artists, or perhaps a serene blend of textures and colors that bring tranquility to a room? Understanding your narrative will guide every subsequent decision, from the pieces you select to the overall mood you create. Think of it like inviting guests into your home; you want to share a particular feeling or experience. Your gallery wall can be the visual embodiment of that.
Next, consider the where. The location of your gallery wall is paramount, as it dictates scale, content, and even the type of hanging method you might employ.
* Living Room: Often the heart of the home, a living room gallery wall can be a grand statement piece above a sofa, a cozy nook beside a fireplace, or a dynamic display around a television. Here, you might lean towards a mix of family photos, inspiring art prints, and perhaps a cherished heirloom mirror to reflect light and add dimension.
* Hallway or Staircase: These transitional spaces are perfect for long, linear gallery walls that invite a leisurely stroll down memory lane. Think of it as an unfolding story as you move through your home. Uniform frames can create a sense of order, while an eclectic mix can add charming curiosity.
* Bedroom: A gallery wall in a bedroom often takes on a more intimate, personal tone. Above the bed, it can serve as a serene focal point, featuring calming landscapes, abstract art, or soft, sentimental photographs.
* Dining Room: Elevate your dining experience with a sophisticated gallery wall featuring botanical prints, abstract pieces, or even unique plates and platters. It’s a wonderful way to spark conversation and infuse elegance into your entertaining space.
* Home Office: Inspire creativity and focus with a gallery wall that reflects your passions or offers motivational quotes. This is a great place to display achievements or art that sparks joy during your workday.
Gathering Your Treasures: What to Include & How to Frame Them

Now for the truly fun part, darling: curating the pieces that will bring your gallery wall to life! This is where your personal style truly shines, where your passions and memories converge into a beautiful visual symphony. Don’t limit yourself to just framed photographs; think outside the box to create a rich, layered display that tells your unique story.
Beyond the Frame: A Tapestry of Treasures
* Art Prints: From abstract expressionism to serene landscapes, vintage botanical illustrations to contemporary graphic designs, art prints offer endless possibilities. Mix high-end limited editions with affordable finds from local artists or online marketplaces.
* Personal Photographs: These are the heartbeats of your home. Think beyond recent snapshots; delve into old family albums for sepia-toned treasures, candid moments, or stunning vacation vistas. Black and white photography can create a cohesive, sophisticated look, even with varied subjects.
* Mirrors: A well-placed mirror or two can do wonders! They reflect light, making a space feel larger and brighter, and add an unexpected textural element. Consider ornate vintage mirrors for a touch of grandeur or sleek, modern designs for a minimalist aesthetic.
* Textiles: Small tapestries, embroidered pieces, or even beautifully framed scarves can introduce softness, texture, and a global flair.
* Decorative Objects: Small shelves can hold cherished heirlooms, hand-painted ceramics, unique sculptures, or even a collection of vintage keys. Think about objects that have personal significance or sculptural beauty.
* Children’s Art: Celebrate the budding artists in your life! Framing a particularly vibrant finger painting or a heartfelt drawing in a simple, elegant frame elevates it to a piece of art worthy of display.
* Meaningful Memorabilia: Concert tickets from a special date, a pressed flower from a wedding bouquet, a postcard from a dream destination—these small tokens of joy can be beautifully framed and incorporated.
Crafting Cohesion: Color, Theme, and Frame Play
Once you have a collection of potential pieces, it’s time to consider how they’ll work together.
* Color Palette: You can go one of two ways:
* Cohesive: Choose a dominant color scheme (e.g., blues and greens, neutrals with pops of blush, black and white) and select pieces that fit within it. This creates a sense of calm and sophistication.
* Eclectic: Embrace a riot of colors and styles for a playful, bohemian, or truly personalized look. The trick here is to ensure there’s still a unifying element, perhaps through frame choice or subject matter.
* Theme: A thematic approach can tie diverse pieces together. Examples include “travel adventures,” “family legacy,” “nature’s beauty,” “abstract interpretations,” or “vintage finds.”
* Frame Selection: This is often where people get stuck, but it’s an opportunity for incredible creativity!
* Matching Frames: Opting for all identical frames (same color, material, style) creates a very clean, modern, and symmetrical look. This works beautifully for a grid layout.
* Mixing Frames: This is where the magic truly happens for an eclectic, lived-in feel. Combine different materials (wood, metal, acrylic), finishes (gold leaf, matte black, natural oak), and styles (ornate, minimalist, distressed). The key to success here is to find a common thread. Perhaps all frames are metallic, but in different tones (gold, silver, bronze), or all are wood, but in varying stains.
* Matting: Don’t underestimate the power of a good mat! A crisp white mat can elevate even a simple print, drawing the eye inward and creating breathing room around the art. It also helps to standardize pieces of different sizes within similar frames. Consider oversized mats for a high-end, gallery feel.
As you gather your treasures, remember that your gallery wall is a living testament to your journey. Don’t be afraid to mix the high with the low, the sentimental with the stylish. Each piece should resonate with you, contributing to the beautiful story you’re about to tell.
Designing Your Layout: The Art of Arrangement
Now that your beautiful collection is gathered, it’s time to play designer! This stage is all about trial and error, ensuring every piece finds its perfect place before a single nail goes into the wall. Think of it as a puzzle where every piece contributes to the overall masterpiece.
Planning is Paramount: Tools for Success
Before you start lifting frames, let’s get organized with a few simple, yet brilliant, techniques:
1. The Floor Layout: This is our absolute favorite method, sweet friend, and it’s practically foolproof!
* Find a large, clear space on your floor – ideally, one that’s roughly the same size as your wall section.
* Lay out all your framed pieces, mirrors, and objects on the floor.
* Begin arranging them, moving pieces around until you find a composition that feels balanced, harmonious, and visually pleasing. Experiment with different orientations (landscape vs. portrait).
* Take photos of layouts you like so you can compare and refine.
2. Craft Paper Cutouts: For an even more precise preview, trace each frame onto craft paper or newspaper, cut them out, and label them.
* Tape these paper templates to your wall using painter’s tape.
* Stand back, observe, and rearrange the paper cutouts until you achieve your desired layout. This gives you a fantastic visual representation without any commitment. It also helps you visualize spacing.
3. Digital Tools: If you’re tech-savvy, apps or online tools can help you mock up your gallery wall digitally. Take a photo of your blank wall and overlay images of your frames and art. While helpful for visualizing, nothing beats the tactile experience of the floor or paper layout.
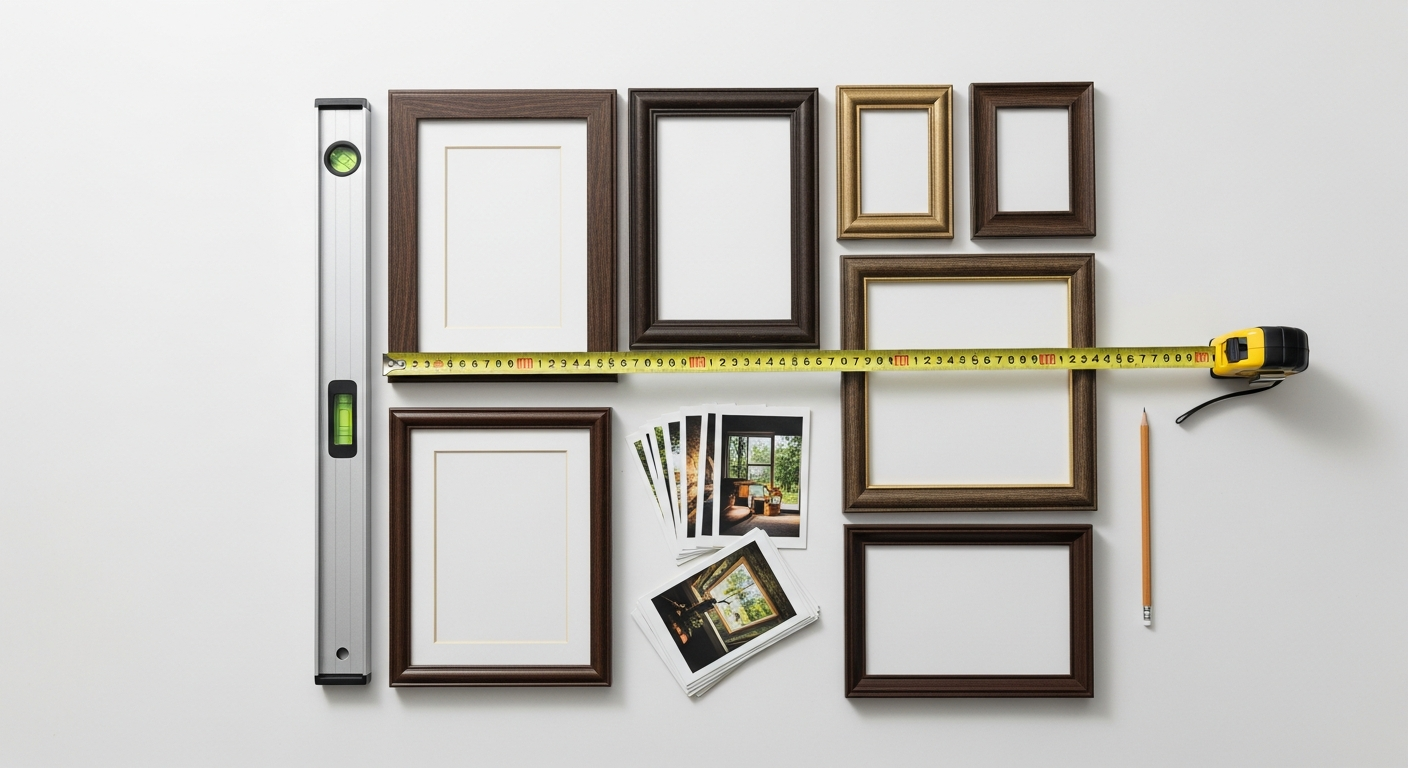
Mastering the Art of Arrangement: Common Layouts & Spacing
There are several popular gallery wall layouts, each offering a distinct aesthetic:
* The Grid Layout (Formal & Symmetrical):
* Best for a cohesive collection of identically sized and framed pieces.
* Arrange frames in perfect rows and columns, with consistent spacing between each piece.
* This creates a clean, sophisticated, and contemporary look. It’s excellent for making a bold, organized statement.
* The Salon Style (Organic & Eclectic):
* This is where you can truly let your personality shine! It’s characterized by an organic, free-flowing arrangement of varied sizes, shapes, and styles.
* Often, there’s a central “anchor” piece (a large frame or mirror) from which smaller pieces radiate outwards.
* Think of it as a puzzle with no fixed rules, allowing for a delightful mix of art, photos, and objects. The key is to achieve visual balance, ensuring no one area feels too heavy or too sparse.
* The Linear Layout (Streamlined & Purposeful):
* Ideal for hallways, above a long console table, or along a staircase.
* Frames are arranged along an imaginary straight line, either horizontally or vertically.
* You can maintain consistent spacing for a refined look or vary it slightly for gentle movement.
* The Central Anchor Layout:
* Start with one large, significant piece in the center (or slightly off-center) of your desired wall space.
* Then, arrange smaller pieces around it, expanding outwards. This creates a strong focal point and helps to visually organize a more eclectic collection.
* The Shelfie Style (Leaning & Layered):
* For a more relaxed, modern look, install picture ledges or floating shelves.
* Lean framed art, photos, and small decorative objects against the wall, layering them for depth.
* This offers incredible flexibility, as you can easily swap out pieces without patching holes.
The Golden Rule of Spacing:
Regardless of your chosen layout, consistent spacing is crucial for a polished look. A general rule of thumb is to leave 2 to 4 inches between frames. For larger frames or a more dramatic effect, you might go slightly wider, but avoid making the gaps too large, or your gallery wall will lose its cohesive impact.
Eye-Level is Key:
When determining the overall height, aim for the center of your gallery wall to be roughly 57 to 60 inches from the floor. This is considered average eye-level and ensures comfortable viewing. If hanging above a sofa or console, ensure there’s at least 6-8 inches of clear space between the top of the furniture and the bottom of your lowest frame.
Take your time with this planning stage. It’s an investment in the final beauty of your wall, and a little patience here will save you much frustration later. Once you’re absolutely delighted with your floor or paper layout, you’re ready to make it permanent!
Hanging Your Masterpiece: Step-by-Step Installation

With your layout perfected, it’s time for the exciting moment of bringing your vision to life on the wall! Don’t let the thought of hammers and nails intimidate you, sweet friend. With the right tools and a systematic approach, you’ll be hanging your beautiful gallery wall with confidence and precision.
Gather Your Tools, Darling:
* Measuring Tape: Essential for precise spacing.
* Pencil: For marking your spots.
* Level: A traditional bubble level or a laser level for perfect horizontals and verticals.
* Hammer: For driving nails.
* Picture Hanging Kit: These often include various hooks, nails, and sometimes even picture hanging wire. Choose hooks appropriate for the weight of your frames.
* Painter’s Tape: Crucial for marking and transferring your layout.
* Craft Paper/Newspaper Cutouts (if you used this method): Your pre-made templates.
* Command Strips or Adhesive Hooks (for renters or lighter items): A fantastic alternative to nails.
* A friend! An extra set of hands and eyes can make a world of difference, especially for larger pieces or complex layouts.
The Installation Process: A Gentle Guide
1. Transferring Your Layout (The Paper Template Method is Pure Gold!):
* If you used the craft paper cutout method (which we highly recommend!), this step is a breeze. Once your paper templates are taped to the wall in their final, perfect arrangement, you’ll mark the hanging point on each paper template.
* For frames with a single hanger (like a sawtooth hook), find the center of the top edge and mark where the nail needs to go.
* For frames with picture wire, pull the wire taut upwards as if it were hanging on a nail, measure the distance from the top of the frame to the wire’s peak, and mark that point on your paper template.
* Once all hanging points are marked on the paper, gently hammer a small nail or screw directly through the marked spot on the paper template, into the wall.
* Carefully tear away the paper template, leaving the nail precisely where it needs to be. This eliminates guesswork and ensures your layout transfers perfectly.
2. The No-Paper Method (If you did a floor layout):
* Start with your anchor piece – usually the largest or most central frame. Measure its hanging point on the back (as described above).
* On the wall, mark where this first nail should go, remembering the 57-60 inch eye-level rule for the center of your gallery. Use your level to ensure it’s perfectly straight.
* Hang the first piece.
* Then, work outwards. For each subsequent piece, measure the desired distance from the piece you just hung (e.g., 3 inches to the right, 2 inches up). Mark that spot on the wall.
* Before hammering, hold the frame up to the spot to double-check. Use your level constantly! This method requires more measuring on the wall itself, so take your time.
3. Hammering & Hanging:
* Use appropriate picture hooks and nails for the weight of your frames. Heavier frames might require two hooks for extra stability or specialized drywall anchors.
* Gently tap the nails into place. Don’t go too deep initially; you can always adjust.
* Hang your frames one by one, checking the level of each piece immediately after hanging. A slight tilt can throw off the entire composition.
4. Using Command Strips (A Renter’s Best Friend!):
* For lighter frames or if you can’t put holes in your walls, Command Strips are a lifesaver.
* Follow the package instructions carefully for proper application and weight limits.
* Press them firmly onto the back of your frame, then onto the wall. The beauty of these is their adjustability and clean removal.
* For an ultra-secure hold for slightly heavier items or added peace of mind, consider Command Picture Hanging Strips, which interlock like Velcro.
Pro Tip for Precision:
If you’re using a laser level, project a grid onto your wall. This can be incredibly helpful for maintaining straight lines and consistent spacing, especially for grid layouts.
Don’t be afraid to make small adjustments once everything is up. Sometimes a piece might look perfect on the floor but needs a tiny nudge once on the wall. That’s perfectly normal! Step back often, observe, and tweak until your gallery wall feels just right. Congratulations, you’ve just brought your beautiful vision to life!
Adding the Finishing Touches & Embracing Evolution
Your gallery wall is up, looking absolutely stunning, and filling your home with personality and charm! But like any beautifully curated space, a gallery wall truly shines when it’s thoughtfully integrated into its surroundings and allowed to evolve over time. These finishing touches and a mindset of gentle evolution are what transform a good gallery wall into a truly extraordinary one.
Harmonizing with its Surroundings: The Finishing Touches
Think of your gallery wall not as an isolated island, but as an integral part of the room’s overall design.
* Thoughtful Lighting: The right lighting can dramatically enhance your gallery wall.
* Picture Lights: Small, elegant lights mounted above individual frames or across the top of the entire wall can highlight your art, especially in the evenings. Battery-operated options are available for ease of installation.
* Track Lighting: If you have track lighting in the room, angle a fixture or two to illuminate the gallery wall.
* Natural Light: Consider how natural light hits the wall throughout the day. Does it cast interesting shadows? Does it make certain colors pop? Ensure direct sunlight isn’t constantly hitting delicate photographs or art, as this can cause fading over time.
* Grounding Elements: Your gallery wall will feel more cohesive if it’s visually connected to the furniture or decor beneath it.
* Console Table or Sideboard: A beautifully styled console table beneath a gallery wall provides a perfect anchor. Adorn it with a vase of fresh flowers, a stack of design books, a sculptural lamp, or a collection of cherished objects that complement the wall art.
* Bench or Settee: In a hallway, a small bench or settee can invite a moment of pause to admire the wall.
* Plants: Introducing greenery, either on a console table or a floor-standing plant nearby, adds life, softens lines, and brings a touch of nature indoors. The organic shapes of plants beautifully contrast with the structured frames.
* Rugs: A well-placed area rug can define the space and tie together the various elements, including your gallery wall, creating a cohesive visual zone.
Embracing Evolution: A Living Narrative
One of the most beautiful aspects of a gallery wall is that it doesn’t have to be static. It’s a living, breathing narrative that can grow and change with you and your family.
* Seasonal Swaps: Just like you might change out throw pillows or candles, consider rotating a few pieces on your gallery wall seasonally. Swap out a summery botanical print for a cozy autumn landscape, or incorporate a festive piece during the holidays.
* New Memories, New Art: As life unfolds, you’ll create new memories and discover new art that resonates with you. Don’t be afraid to add to your gallery wall! Find a spot for that treasured photograph from your most recent family vacation or that print from a local artist you adore. A well-designed salon-style gallery wall is particularly forgiving for additions.
* Refreshing the Look: Sometimes, all it takes is a simple refresh to make your gallery wall feel new again. This could mean:
* Swapping out mats: Changing a cream mat to a crisp white one, or adding an oversized mat, can instantly update a piece.
* Repainting a frame: Give a tired frame a fresh coat of paint in a new color (e.g., matte black, antique gold) to match an evolving decor scheme.
* Rearranging existing pieces: Even a subtle shift in the arrangement can give the wall a fresh perspective.
* Maintenance: Keep your gallery wall looking its best by regularly dusting frames and wiping down glass. For delicate art or photographs, use a soft, dry microfiber cloth.
Your gallery wall is a testament to your journey, your passions, and the beautiful life you’re building. It’s a space that should bring you joy and comfort every single day. So, once it’s complete, step back, admire your handiwork, and savor the warm, inviting atmosphere you’ve created. It truly is a masterpiece, sweet friend!
Your Story, Beautifully Told
And there you have it, sweet friend! From that first spark of inspiration to the final, loving placement of each piece, you now have all the tools and guidance to create a gallery wall that is truly a work of art. It’s more than just decor; it’s a heartfelt expression of who you are, what you cherish, and the beautiful memories you’ve collected along the way. Your home deserves spaces that feel warm, inviting, and deeply personal, and a thoughtfully curated gallery wall does just that. So go forth, gather your treasures, trust your instincts, and let your walls tell your most beautiful story. We can’t wait to see the magic you create!
“`json
{
“@context”: “https://schema.org”,
“@graph”: [
{
“@type”: “Article”,
“headline”: “Curate Your Story: The Ultimate Guide to Crafting a Beautiful Gallery Wall”,
“image”: [
“https://www.rocksaltplum.com/images/gallery-wall-hero.jpg”,
“https://www.rocksaltplum.com/images/gallery-wall-process.jpg”,
“https://www.rocksaltplum.com/images/gallery-wall-finished.jpg”
],
“datePublished”: “2026-03-08T09:00:00+08:00”,
“dateModified”: “2026-03-08T10:30:00+08:00”,
“author”: {
“@type”: “Person”,
“name”: “Rock Salt Plum Editor”
},
“publisher”: {
“@type”: “Organization”,
“name”: “Rock Salt Plum”,
“logo”: {
“@type”: “ImageObject”,
“url”: “https://www.rocksaltplum.com/images/logo.png”
}
},
“description”: “Transform your blank walls into a captivating visual story with Rock Salt Plum’s comprehensive guide to creating a gallery wall. Learn how to plan, curate, arrange, and hang your art and memories with style and ease, blending Southern hospitality with modern living.”
},
{
“@type”: “FAQPage”,
“mainEntity”: [
{
“@type”: “Question”,
“name”: “How high should I hang my gallery wall?”,
“acceptedAnswer”: {
“@type”: “Answer”,
“text”: “A common guideline is to aim for the center of your gallery wall to be at average eye-level, which is typically 57 to 60 inches from the floor. If hanging above furniture, ensure there’s at least 6-8 inches of clear space between the top of the furniture and the bottom of your lowest frame.”
}
},
{
“@type”: “Question”,
“name”: “Can I mix different frame styles and colors?”,
“acceptedAnswer”: {
“@type”: “Answer”,
“text”: “Absolutely, and we encourage it! Mixing different frame styles, materials (wood, metal, acrylic), and finishes (gold, black, natural wood) adds depth, character, and an eclectic charm to your gallery wall. To maintain a sense of cohesion, try to find a unifying element, such as a consistent color palette within the art itself, or by having a few frames in a matching finish, even if the styles vary.”
}
},
{
“@type”: “Question”,
“name”: “What if I’m renting and can’t put nails in the wall?”,
“acceptedAnswer”: {
“@type”: “Answer”,
“text”: “Don’t you worry, darling! Command Strips and other adhesive hooks are your best friends. They come in various sizes and weight capacities, allowing you to hang everything from lightweight photos to moderately heavy frames without damaging your walls. For a layered look, consider using picture ledges or floating shelves, where you can lean frames and objects against the wall without any holes.”
}
},
{
“@type”: “Question”,
“name”: “How do I choose a cohesive color palette for my gallery wall?”,
“acceptedAnswer”: {
“@type”: “Answer”,
“text”: “There are a few lovely ways! You can select a dominant color or two from your room’s existing decor and choose art and photos that incorporate those hues. Another approach is to use a consistent element, like black and white photography, and then introduce subtle pops of color through one or two art pieces. Alternatively, you can embrace a more neutral palette with varied textures and shades of cream, beige, and gray for a serene and sophisticated look.”
}
},
{
“@type”: “Question”,
“name”: “How do I start if I don’t have much art or photos yet?”,


