


Homemade Pizza Dough Secrets Revealed: The Ultimate Guide for 2026
There is a profound, almost primal satisfaction in pulling a perfectly charred, bubbly, and fragrant pizza out of your home oven. For years, the “perfect” crust seemed to be a closely guarded secret, reserved only for the pizzaiolos of Naples or the high-end artisanal shops in New York. We’ve all tried those quick, 30-minute recipes that promise greatness but end up tasting like bland, dense biscuit dough. But as we move into 2026, the veil has been lifted.
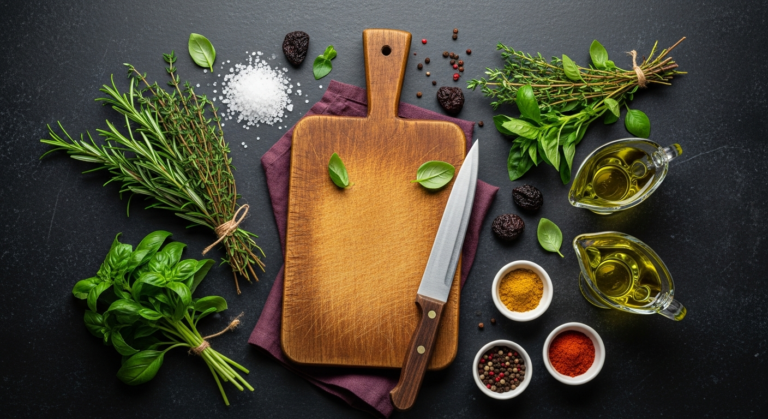
The difference between a mediocre home pizza and a masterpiece isn’t expensive equipment or a secret Italian lineage; it’s the science of dough management. Achieving that elusive combination of a crisp exterior, a chewy crumb, and a complex flavor profile comes down to understanding hydration, fermentation, and flour protein. In this comprehensive guide, we are pulling back the curtain on the industry’s best-kept secrets. Get ready to transform your kitchen into the neighborhood’s favorite pizzeria.
1. The Flour Foundation: Why Protein Content is Everything
If you think all-purpose flour is enough to make a world-class pizza, you’re missing the first secret of the pros. The soul of any pizza dough is its gluten structure, and gluten is built from protein. When you look at a bag of flour, you aren’t just looking at powder; you’re looking at the structural potential of your crust.
For that classic “leopard-spotted” Neapolitan crust or a sturdy New York slice, you need flour with a high protein content, typically between 12% and 13.5%. This is why **Tipo 00 flour** and **High-Gluten Bread Flour** are the gold standards. Tipo 00 is milled incredibly fine, allowing for a soft, supple dough that can withstand the intense heat of a 2026-style outdoor pizza oven without becoming tough. Bread flour, on the other hand, provides the “chew” and strength required to hold up heavy toppings without the dreaded “soggy middle.”
The secret lies in the “W index,” a measure of flour strength often used by professional bakers. While most grocery store bags don’t list it, choosing a flour labeled “Long Fermentation” or “Reinforced” usually indicates a higher W-rating. By choosing the right flour, you ensure your dough has the elasticity to stretch paper-thin without tearing and the strength to trap the carbon dioxide bubbles produced by your yeast.
2. The Power of Cold Fermentation: Time is the Secret Ingredient
The most significant mistake home cooks make is rushing the process. If you are mixing your dough and baking it two hours later, you are leaving 80% of the potential flavor on the table. The industry secret to that “artisan” taste—that slight tang and deep aroma—is **Cold Fermentation.**
When you let your dough rise in the refrigerator for 24 to 72 hours, a magical chemical process occurs. The yeast works much slower at cold temperatures, which prevents it from over-proofing while allowing enzymes to break down complex starches into simple sugars. This process, known as “proteolysis,” softens the gluten strands, making the dough easier to stretch later, and creates a more flavorful, digestible crust.
By 2026, the “72-hour dough” has become the standard for enthusiasts. During this time, the dough develops those beautiful tiny bubbles on the surface and a complex “sourdough-lite” flavor profile. If you want a crust that smells like a bakery and shatters with a crisp crunch, you must give it time in the cold. Remember: the fridge is your best friend in the quest for the perfect slice.
3. Mastering Hydration: The “Wet Dough” Secret
In the world of professional pizza making, we don’t talk in cups and tablespoons; we talk in percentages. The “Hydration Level” is the ratio of water to flour by weight. Most beginners start with a low-hydration dough (around 55-60%) because it’s easy to handle and doesn’t stick to your hands. However, low hydration is the reason your crust might feel dry or heavy.
The secret to those airy, cavernous “corniciones” (the edge of the crust) is **High Hydration.** Pros often aim for 65% to 70% hydration. Water turns into steam in the oven; the more water you have trapped in your gluten network, the more the dough will “pop” and expand when it hits the heat.
Working with 70% hydration dough can be sticky and frustrating at first. The secret to handling it is the “Autolyse” method—mixing just the flour and water and letting it sit for 30 minutes before adding salt and yeast. This jumpstarts gluten development without you having to do a lick of work. Additionally, using wet hands instead of floured hands when folding the dough prevents you from accidentally adding too much extra flour and ruining your ratios.
4. The “Windowpane Test” and Proper Kneading
How do you know when your dough is actually ready? Most recipes say “knead for 10 minutes,” but every person’s strength and every stand mixer’s speed is different. The secret to knowing your dough is ready for fermentation is the **Windowpane Test.**
Take a small piece of dough (about the size of a golf ball) and gently stretch it out between your fingers. If you can stretch it thin enough to see light passing through it without the dough tearing, your gluten network is fully developed. If it tears quickly, you need to keep kneading.
In 2026, many home bakers are moving away from aggressive kneading in favor of “Stretch and Folds.” Instead of pounding the dough on the counter, you simply fold it over itself four times every 30 minutes for two hours. This gentle method builds a more organized gluten structure, leading to a lighter, more delicate crumb. Whether you use a stand mixer or your hands, never stop until your dough passes the windowpane test; otherwise, your pizza will be crumbly rather than chewy.
5. Stretching, Not Rolling: Preserving the Air
You’ve spent three days fermenting your dough, carefully measuring your hydration, and selecting the finest flour. Do not—under any circumstances—reach for a rolling pin.
The rolling pin is the enemy of the artisan pizza. When you use a pin, you are forcibly pressing out all the precious carbon dioxide bubbles you spent days cultivating. The secret to a puffy, light crust is manual stretching.
Start by pressing the dough from the center outward, leaving about an inch of the rim untouched. This pushes the air into the “cornicione.” Once you have a flat disc, use the “steering wheel” method: hold the edge of the dough and let gravity pull the rest down as you rotate it. Alternatively, use the back of your knuckles to gently stretch the dough from the center. By preserving those air pockets, you ensure that the heat of the oven causes the edges to puff up into a beautiful, airy crown rather than a flat, dense cracker.
6. Heat Management: Simulating a Wood-Fired Oven
Most home ovens max out at 500°F or 550°F (approx. 260-290°C). A traditional Neapolitan oven, however, burns at 900°F. The secret to closing this gap is **Thermal Mass.**
A thin baking sheet simply cannot hold enough heat to give you a “bottom-up” cook that crisps the undercarriage before the cheese burns. To fix this, you need a **Baking Steel** or a high-quality **Pizza Stone.** Steels are the 2026 preferred choice because steel conducts heat much more efficiently than stone, delivering a massive burst of energy to the dough the second it touches the surface.
Position your steel on the top rack of the oven and preheat it for at least an hour. Another pro secret? Use your broiler. Once the pizza is on the steel, turn the broiler on high. This creates “top-down” radiant heat that mimics the flames licking the ceiling of a wood-fired oven, giving you those beautiful charred spots (leopard spotting) on the crust in just 3 to 5 minutes.
—
Frequently Asked Questions (FAQ)
#
1. Why is my pizza dough snapping back when I try to stretch it?
This is a sign that the gluten is too “tight” or “tense.” This usually happens if the dough is too cold or if it hasn’t rested long enough after being shaped into balls. The secret is to let your dough sit at room temperature for at least 2 to 4 hours before stretching. If it still snaps back, give it another 20 minutes of rest to let the gluten relax.
#
2. Can I use active dry yeast instead of instant yeast?
Yes, but they require different handling. Active dry yeast needs to be “bloomed” in warm water before being added to the flour. Instant yeast (or Rapid Rise) can be mixed directly into the dry ingredients. In 2026, many enthusiasts prefer **Fresh Yeast** or a **Sourdough Starter (Levain)** for even better flavor, but instant yeast is perfectly fine for high-hydration, cold-fermented doughs.
#
3. My crust is soggy in the middle. What am I doing wrong?
Soggy middles are usually caused by three things: too many watery toppings (like fresh mozzarella that hasn’t been drained), an oven that isn’t hot enough, or “over-saucing.” The secret is to use low-moisture mozzarella or drain your fresh buffalo mozzarella for 4 hours before use. Also, ensure you are using a preheated baking steel to cook the dough from the bottom up.
#
4. Is sugar necessary in pizza dough?
In a traditional Neapolitan recipe, sugar is a big “no.” However, for home ovens that don’t reach 900°F, a small amount of sugar (about 1-2% of the flour weight) can help with browning. It provides food for the yeast and helps the crust caramelize at lower temperatures, giving you a more attractive color.
#
5. How long can I keep pizza dough in the fridge?
The “sweet spot” for flavor and texture is usually between 48 and 72 hours. After 96 hours (4 days), the gluten structure begins to break down too much, and the dough may become overly “hoochy” (smelling strongly of alcohol) and difficult to handle. If you can’t use it by day three, the secret is to move the dough balls to the freezer, where they will stay fresh for up to three months.
—
Conclusion: Practice Makes Perfect
Mastering homemade pizza dough is a journey, not a destination. While these secrets—high-protein flour, cold fermentation, high hydration, and thermal mass—will instantly elevate your game, the real secret is the intuition you develop over time.
By the time you reach mid-2026, you’ll be able to feel the dough and know if it needs a splash more water or a bit more rest. You’ll learn to listen to the “crunch” as you slice through your first homemade masterpiece and realize that you’ve surpassed the quality of any delivery chain. Pizza is a living, breathing thing; treat it with patience and the right scientific principles, and it will reward you with the best meal you’ve ever had in the comfort of your own home. Happy baking!


