


Nourishing Your Family: Smart Freezer Meal Strategies for New Parents
Imagine, if you will, the serene satisfaction of knowing a delicious, healthy dinner is just a thaw and reheat away, even on your most exhausted days. No last-minute scrambling, no relying on takeout, just the comforting aroma of a meal you prepared with foresight and love. At rocksaltplum.com, we believe your home should be a haven of comfort and joy, and that extends to the kitchen. In this comprehensive guide, we’ll dive deep into the art and science of freezer meal strategies, specifically tailored to empower new parents. From smart planning to essential tools and delectable recipes, we’re here to help you stock your freezer with culinary treasures, ensuring your family stays well-fed and your precious time is spent on what truly matters.
The Indispensable “Why”: Why Freezer Meals Are a Lifeline for New Parents
Becoming a parent reshapes your world in countless beautiful ways, but it also introduces a new set of challenges, especially concerning time and energy. The idea of whipping up a gourmet meal after a night of interrupted sleep might feel utterly impossible. This is precisely why embracing freezer meals isn’t just a good idea; it’s a fundamental strategy for maintaining your well-being and sanity during this transformative period. Let’s explore the profound benefits that make freezer meals an indispensable tool for new parents, transforming the chaotic into the calm.
Firstly, and perhaps most obviously, is the incredible gift of time-saving. Those precious moments you used to spend chopping, stirring, and simmering can now be reallocated to bonding with your baby, catching up on much-needed rest, or simply enjoying a quiet cup of tea. Freezer meals liberate you from the daily dinner dilemma, offering a pre-made solution that requires minimal effort when you’re at your most fatigued. Secondly, they are powerful stress-reducers. The mental load of a new parent is immense; removing the “what’s for dinner?” question from your daily mental checklist can significantly alleviate stress and anxiety. Knowing you have nourishing options readily available provides a profound sense of peace and preparedness.
Beyond convenience, freezer meals champion healthy eating. During postpartum recovery and breastfeeding, your body requires nutrient-dense foods. Relying on takeout or convenience foods can often lead to less healthy choices. By preparing meals in advance, you control the ingredients, ensuring your family receives wholesome, balanced nutrition. This also extends to being incredibly budget-friendly. Buying ingredients in bulk, when they’re on sale, and cooking in larger quantities is often more economical than frequent grocery runs for small items or constant takeout orders. You minimize food waste and maximize your grocery budget.
Finally, and perhaps most importantly, freezer meals contribute significantly to your mental well-being. The act of preparing these meals, whether alone or with a partner, can be a therapeutic process, a proactive step in caring for your future self. And the relief of pulling a homemade meal from the freezer on a particularly challenging day is a small victory that can boost your morale. It’s a tangible reminder that you planned ahead, that you’ve got this, and that you deserve to be nourished, just as much as your little one.
Laying the Groundwork: Planning Your Freezer Meal Strategy

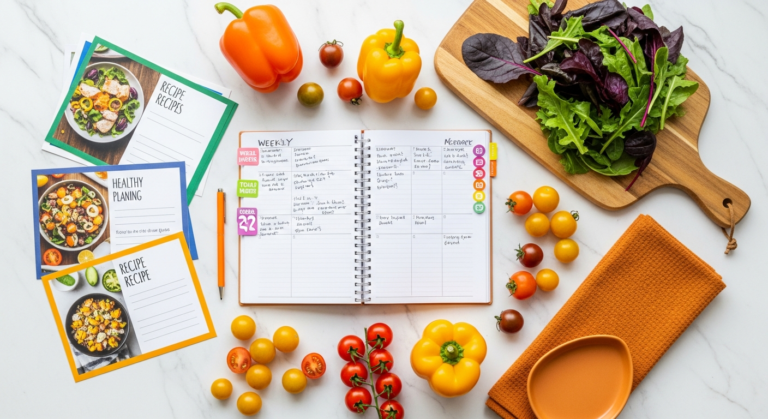
The secret to a successful freezer meal journey for new parents lies not just in the cooking, but in the meticulous planning that precedes it. Think of it as building the foundation for your culinary sanctuary. A well-thought-out strategy ensures you’re maximizing your efforts, minimizing waste, and truly creating meals that will serve your family’s needs and preferences. Let’s delve into the crucial steps for effective planning.
Assessing Your Unique Needs and Preferences
Before you even think about recipes, take a moment to consider your family’s specific situation. This includes:
- Dietary Requirements: Are there any allergies, intolerances, or specific dietary needs (e.g., gluten-free, dairy-free, vegetarian)? Factor in any postpartum dietary considerations, especially if you’re breastfeeding and monitoring for baby sensitivities.
- Flavor Preferences: What do you genuinely enjoy eating? Don’t stock your freezer with meals you won’t be excited to eat. Include comfort foods, international flavors, and a variety of dishes to prevent palate fatigue.
- Kitchen Space and Freezer Capacity: Be realistic about how much freezer space you have. Do you have an upright freezer, a chest freezer, or just the freezer compartment of your fridge? This will dictate the volume and type of meals you can store.
- Meal Frequency: How many freezer meals do you realistically need? Aim for enough to cover 3-4 dinners a week for the first few weeks, supplemented by fresh meals or easy options.
Batch Cooking vs. “Double-Up” Method
There are two primary approaches to building your freezer stash:
- Batch Cooking: This involves dedicating a specific block of time (e.g., a weekend afternoon) solely to preparing multiple freezer meals from start to finish. It’s efficient if you have a chunk of uninterrupted time.
- “Double-Up” Method: This more organic approach involves cooking your regular dinner, but making double or triple the quantity. One portion is for immediate consumption, and the others are prepped for the freezer. This is excellent for gradual accumulation and for those who prefer not to dedicate a full day to cooking.
Many parents find a hybrid approach works best, perhaps one big batch cooking session before the baby arrives, and then using the double-up method to replenish the stash afterwards.
Crafting Your Master List of Freezer-Friendly Favorites
Brainstorm a list of meals that:
- You genuinely enjoy.
- Freeze and reheat well (think casseroles, soups, stews, cooked grains, baked goods).
- Are relatively easy to prepare in larger quantities.
- Require minimal fuss once thawed and reheated.
Consider categories like hearty main courses, breakfast items (muffins, breakfast burritos), snacks (energy bites), and even components like cooked chicken or sauces. A good starting point might be your family’s top 5-7 comfort food recipes.
Shopping Smart: The Key to Efficiency
Once your meal plan is set, create a detailed shopping list. This is where you save time and money. Focus on:
- Bulk Purchases: Buy larger cuts of meat, bags of frozen vegetables, and pantry staples when on sale.
- Ingredient Overlap: Choose recipes that share common ingredients to streamline your shopping trip and reduce waste.
- Online Grocery Ordering: Many new parents swear by grocery delivery services like Instacart or local supermarket delivery. It’s a lifesaver when you’re short on time or unable to leave the house.
By investing time in this planning phase, you set yourself up for a smooth, enjoyable, and incredibly rewarding freezer meal experience. It transforms a daunting task into an organized, empowering project.
Essential Tools and Storage Solutions for Freezer Meal Success
Just as a carpenter needs the right tools, a freezer meal maestro thrives with the proper equipment. Investing in quality kitchen gadgets and smart storage solutions will not only make your prep sessions more efficient but also ensure your meals maintain their deliciousness from freezer to table. Let’s explore the must-have items that will elevate your freezer meal game, making it a truly enjoyable and streamlined process.
The Heart of the Operation: Storage Containers
Choosing the right containers is paramount for preventing freezer burn, maximizing space, and ensuring easy reheating. Here’s a comparison of popular options:
| Container Type | Pros | Cons | Best For |
|---|---|---|---|
| Glass Containers (e.g., Pyrex, OXO Good Grips) | Durable, oven-safe, microwave-safe, dishwasher-safe, no staining, eco-friendly. Clear allows easy visibility. | Heavier, can break if dropped, more expensive upfront, takes up more space if not stackable. | Casseroles, lasagna, soups, stews, individual portions. Excellent for direct oven reheating. |
| Silicone Reusable Bags (e.g., Stasher, Zip Top) | Eco-friendly, flexible, durable, freezer-safe, microwave-safe, oven-safe (some brands), good for marinades. | Can be pricey, harder to clean tight corners, may absorb odors over time. | Soups, sauces, marinades, chopped veggies, individual portions of cooked grains. |
| Freezer Bags (e.g., Ziploc Freezer Bags, Glad Freezer Bags) | Cost-effective, flexible (can mold to freezer space), great for flat freezing, easy labeling. | Single-use (less eco-friendly), prone to punctures, can be less sturdy for liquids. | Soups (frozen flat), chili, cooked ground meat, purees, chopped fruits/vegetables. |
| Aluminum Foil Pans | Inexpensive, disposable (no washing!), oven-safe, good for gift-giving meals. | Single-use, not microwave-safe, can be flimsy, less aesthetically pleasing. | Casseroles, baked pasta dishes, anything going straight into the oven. |
When selecting containers, prioritize airtight seals to combat freezer burn. For soups and stews, consider freezing them flat in freezer bags, then transferring the frozen block to a more rigid container or storing upright to save space.
Kitchen Gadgets That Streamline Prep
- Slow Cooker (e.g., Crock-Pot, Instant Pot with slow cook function): A true workhorse for hands-off cooking. Perfect for large batches of chili, pulled pork, stews, and shredded chicken that can then be portioned and frozen.
- Instant Pot/Pressure Cooker: Speeds up cooking time dramatically for beans, grains, and meats, making batch cooking much faster. Many recipes can go from raw to freezer-ready in under an hour.
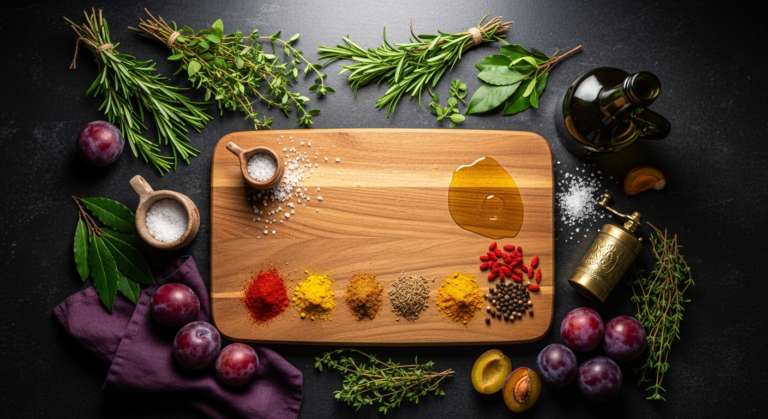
- Food Processor: Indispensable for quickly chopping large quantities of vegetables (onions, carrots, celery) for mirepoix, or pureeing soups and sauces. Brands like Cuisinart or KitchenAid offer reliable options.
- Large Stock Pots and Sheet Pans: Essential for cooking big batches of soup, pasta sauces, or roasting vegetables and meats.
- Measuring Cups and Spoons: For consistent results, especially when scaling recipes.
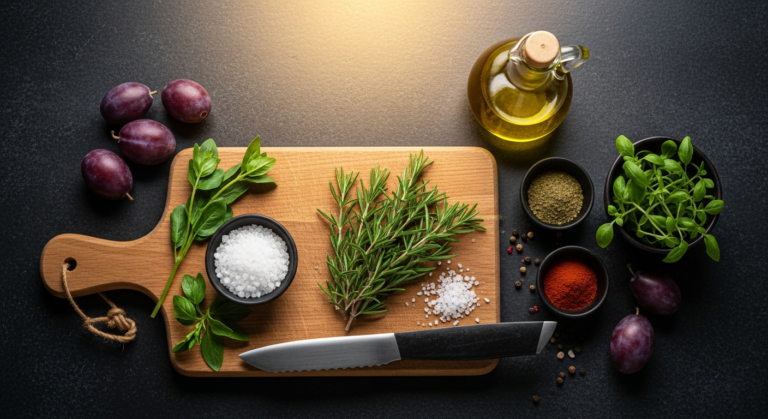
- Sharp Knives and Cutting Boards: Good quality tools make prep work safer and more efficient. Consider a set from Wüsthof or Victorinox.
The Art of Labeling and Organization
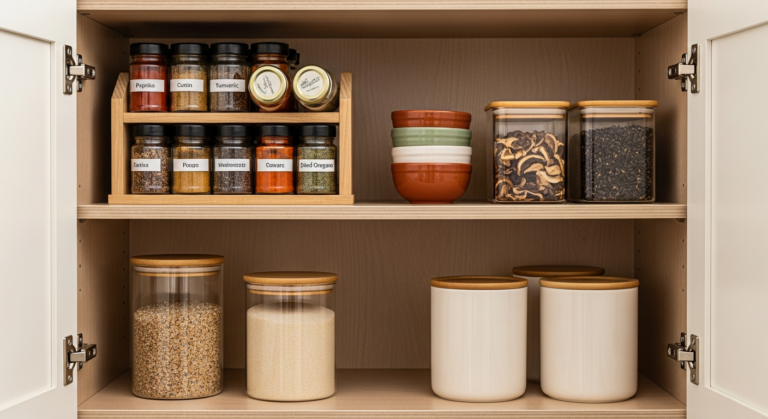
A well-stocked freezer is only useful if you know what’s inside! Effective labeling is non-negotiable.
- Labeling Supplies: Invest in freezer-safe labels or a permanent marker. Masking tape works well too.
- What to Include on Labels:
- Meal Name (e.g., “Chicken & Veggie Chili”)
- Date Prepared
- Number of Servings
- Reheating Instructions (e.g., “Thaw overnight, bake at 375°F for 30 mins” or “Microwave on high for 5-7 mins”)
- Freezer Organization:
- First In, First Out (FIFO): Rotate your meals to use older ones first.
- Categorize: Designate sections for breakfast, dinner, snacks, or specific ingredients.
- Vertical Stacking: Utilize vertical space with stackable containers or shelves designed for freezers.
- Inventory List: Keep a running list on your fridge or inside the freezer door of what you have, and cross items off as you use them. This prevents forgotten meals and helps with meal planning.
By equipping yourself with these tools and embracing smart organization, you’ll transform your freezer into a well-oiled machine, ready to deliver delicious, homemade meals whenever you need them most.
Recipes That Freeze Beautifully: Go-To Dishes for New Families

Now for the fun part: filling your freezer with comforting, nutritious meals! Not all recipes are created equal when it comes to freezing, so selecting wisely is key. We’re looking for dishes that hold their texture and flavor, reheat beautifully, and offer the kind of wholesome goodness new parents crave. Here’s a curated list of categories and specific ideas that consistently deliver freezer meal success, along with tips for optimal freezing.
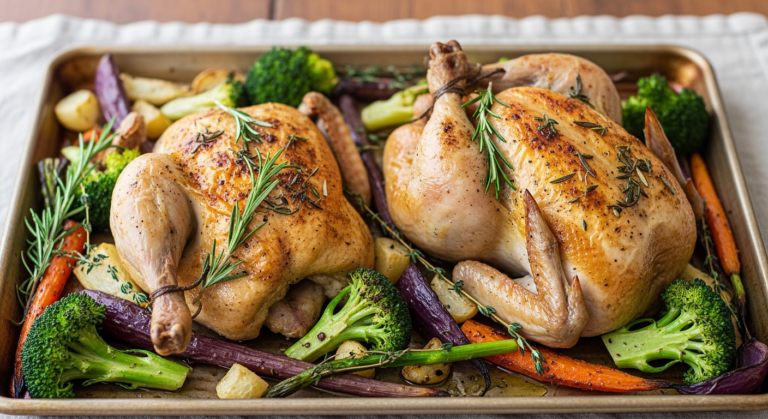
Hearty Main Courses: The Dinner Lifesavers
These are the backbone of your freezer stash, providing complete meals that are satisfying and easy to pair with a simple side salad or crusty bread.
- Lasagna & Baked Pastas: Both meat and vegetarian lasagnas (like a spinach and ricotta version) are freezer champions. Assemble them in aluminum foil pans, cover tightly, and freeze. You can bake from frozen or thaw first. Other baked pastas like ziti or macaroni and cheese also work wonderfully.
- Chili & Soups: Almost all thick, broth-based soups and chilis freeze exceptionally well. Think classic Beef Chili, White Chicken Chili, Lentil Soup, Minestrone, or a hearty Chicken Noodle Soup. Freeze in individual portions for quick lunches or larger family-sized bags/containers. Avoid freezing soups with cream or potatoes if you want to maintain perfect texture, though many find it acceptable.
- Shepherd’s Pie & Pot Pies: These comfort classics are perfect for freezing. Prepare the filling and topping, assemble in an oven-safe dish (or individual ramekins), and freeze unbaked or baked. Chicken Pot Pie with a flaky crust is always a hit.
- Meatballs & Meatloaf: Cooked meatballs (beef, turkey, or even veggie) freeze perfectly, either with or without sauce. Meatloaf can be baked, sliced, and frozen, then reheated with your favorite gravy.
- Shredded Meats: Cook large batches of shredded chicken (in a slow cooker or Instant Pot), pulled pork, or beef barbacoa. These versatile proteins can be used in tacos, sandwiches, salads, or bowls throughout the week. Freeze in 1-2 cup portions.
- Casseroles: From Chicken Broccoli Rice Casserole to Tuna Noodle Casserole, these one-dish wonders are designed for make-ahead convenience. Assemble completely, cover, and freeze.
Breakfast & Brunch: Starting the Day Right
Don’t forget the most important meal of the day! A grab-and-go breakfast can be a lifesaver on busy mornings.
- Breakfast Burritos/Sandwiches: Cooked eggs, cheese, sausage/bacon, and veggies wrapped in tortillas or layered on English muffins. Wrap individually in foil or parchment paper, then freeze. Reheat in the microwave or oven.
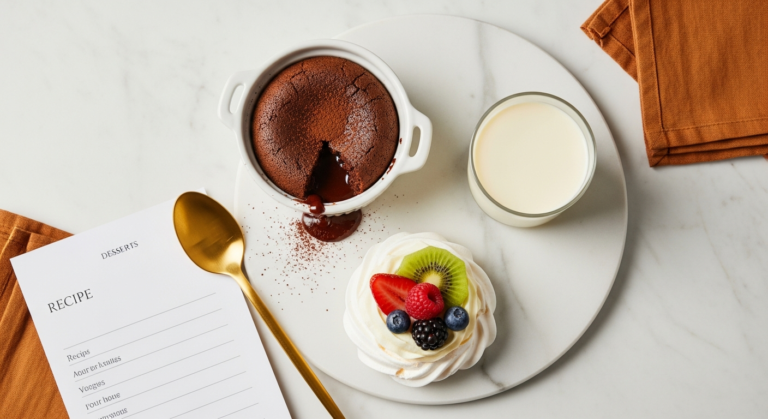
- Muffins & Scones: Bake a large batch of blueberry muffins, banana bread muffins, or savory cheddar scones. Freeze once cooled. Thaw at room temperature or warm briefly in the microwave.
- Oatmeal Cups: Prepare baked oatmeal in muffin tins, or portion cooked steel-cut oats into individual containers.
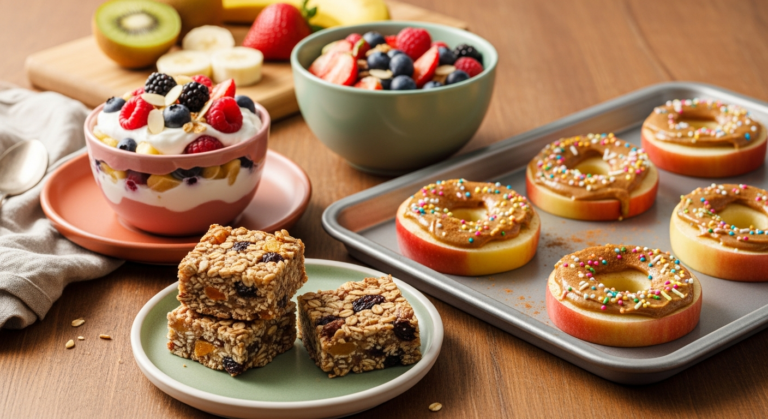
Snacks & Sides: Quick Bites and Meal Boosters
- Energy Bites/Bars: No-bake energy bites made with oats, nut butter, and seeds are perfect for a quick, nutritious boost. Freeze them for longer storage.
- Cooked Grains: Cook large batches of quinoa, brown rice, or farro. Portion into freezer bags or containers. Thaw and reheat for quick sides or additions to salads.
- Pesto & Sauces: Homemade pesto, marinara sauce, or even a simple veggie puree can be frozen in ice cube trays (for small portions) or larger containers. Great for quick pasta dishes or as a flavor boost.
Tips for Optimal Freezing & Reheating:
- Cool Completely: Always ensure food is completely cooled before freezing to prevent condensation, ice crystals, and freezer burn.
- Airtight is Key: Use freezer-safe containers or bags, pressing out as much air as possible to prevent freezer burn.
- Portion Smartly: Freeze in meal-sized portions for your family, whether that’s individual servings or family-sized.
- Don’t Overfill: Leave a little headspace in containers for liquids, as they expand when frozen.
- Thawing: Most meals are best thawed in the refrigerator overnight. Smaller items can be thawed more quickly in cold water or directly microwaved.
- Reheating: Always reheat food thoroughly to an internal temperature of 165°F (74°C). For casseroles, oven reheating often yields the best texture. Soups and stews can be reheated on the stovetop or in the microwave.
By focusing on these freezer-friendly categories and following these simple tips, you’ll build a freezer full of delicious, ready-to-eat meals that will truly support you through the beautiful chaos of new parenthood.
The Art of the Freezer Meal Prep Session: Making It Enjoyable and Efficient
So you’ve planned your meals, gathered your tools, and picked your recipes. Now comes the exciting part: the actual prep session! While it might seem daunting to dedicate a block of time to cooking, approaching it with a strategic mindset and a touch of joy can transform it into a surprisingly therapeutic and incredibly productive experience. Think of it as an investment in your future, less stressed self. Here’s how to master your freezer meal prep session.
Setting the Scene: Dedicated Time and Mindset
First, pick a time when you can be relatively undisturbed. For some, this might be a weekend afternoon, for others, a quiet evening after the baby is asleep (or during an extended nap). If possible, enlist your partner or a friend to help with childcare or even the prep itself. Put on your favorite music, light a scented candle (if safe and appealing), and get into a focused, positive mindset. Remember why you’re doing this: to nourish your family and reclaim precious time later.
Mise en Place: The Chef’s Secret Weapon
“Mise en place” is a French culinary term meaning “everything in its place,” and it’s absolutely crucial for efficient batch cooking. Before you even turn on the stove, get all your ingredients ready:
- Wash and Chop: Wash all vegetables and chop them according to your recipes. Store them in separate bowls or containers.
- Measure Dry Ingredients: Measure out spices, flours, sugars, and other dry ingredients.
- Portion Meats: Trim and portion any meats.
- Gather Equipment: Have all your pots, pans, cutting boards, and storage containers within easy reach.
This upfront organization prevents frantic searching mid-recipe and allows you to move seamlessly from one step to the next, significantly speeding up your overall cooking time.
The Assembly Line Approach: Streamlining Your Efforts
Once your mise en place is complete, adopt an assembly line mentality, especially if you’re making multiple batches of the same meal or similar components.
- Start with the Longest Cooks: Begin with anything that needs to simmer for a long time (e.g., chili, slow cooker pulled pork) or bake for an extended period (e.g., lasagna).
- Overlap Tasks: While one dish is simmering, chop vegetables for another. While a casserole is baking, assemble breakfast burritos. Maximize every moment.
- Utilize All Appliances: If you have both a slow cooker and an Instant Pot, use them simultaneously. Roast vegetables in the oven while a soup simmers on the stovetop.
- Batch Similar Steps: If multiple recipes call for sautéing onions, do them all at once in a large pan. If you’re browning ground meat for chili and tacos, do it all together.
- Assembly Time: Once components are cooked, set up an assembly line for packaging. Have your containers, labels, and markers ready. Fill containers, label them clearly, and move them aside for cooling.
Safe Cooking and Cooling Practices
Food safety is paramount, especially when freezing. Follow these guidelines:
- Cook Thoroughly: Ensure all meats are cooked to their safe internal temperatures.
- Rapid Cooling: Cool hot food quickly before freezing to prevent bacterial growth. Divide large batches into smaller, shallow containers to speed up cooling. You can place hot containers in an ice bath in your sink, or stir frequently to release heat.
- Don’t Freeze Hot Food: Never put hot food directly into the freezer. This can raise the temperature of other frozen items, potentially thawing and refreezing them, and can also make your freezer work harder. Cool to room temperature (within two hours) before freezing.
By embracing these strategies, your freezer meal prep session will become a productive, even enjoyable, ritual. You’ll be amazed at how much you can accomplish, setting yourself up for weeks of effortless, delicious meals and more precious time with your little one.
Thawing and Reheating: Bringing Freezer Meals to Life with Ease
The beauty of freezer meals truly shines when it’s time to enjoy them. After all your diligent planning and prepping, the goal is a seamless transition from frozen block to delicious, ready-to-eat meal with minimal fuss. Understanding the best practices for thawing and reheating is crucial for maintaining food safety, texture, and flavor. Let’s unlock the secrets to bringing your culinary treasures back to life.
Safe Thawing Methods: Patience is a Virtue (Mostly)
Proper thawing prevents bacterial growth and ensures even reheating. Here are the safest and most effective methods:
- Refrigerator Thawing (The Gold Standard): This is the safest and most recommended method. Simply transfer your frozen meal from the freezer to the refrigerator 24-48 hours before you plan to eat it. Larger items like whole casseroles will take longer than individual portions. While it requires foresight, it ensures even thawing and keeps food at a safe temperature.
- Cold Water Thawing (Faster for Smaller Items): For quicker thawing, place your sealed freezer meal (still in its airtight bag or container) into a bowl of cold water. Change the water every 30 minutes to keep it cold. This method is faster than the fridge but requires more attention. Never use hot water, as it can bring the food into the “danger zone” for bacterial growth.
- Microwave Thawing (Quickest, but Can Be Uneven): Use the defrost setting on your microwave for small portions or individual servings. Be aware that microwaves can start to cook the edges of the food while the center is still frozen, so stir or break up the food frequently. Food thawed in the microwave should be cooked immediately after thawing.
Important Note: Never thaw food at room temperature on the counter. This allows bacteria to multiply rapidly. Once thawed, food should be cooked within 1-2 days.
Reheating Instructions for Various Meal Types:
The method you choose for reheating depends on the type of meal and your desired outcome.
- Casseroles and Baked Pastas (e.g., Lasagna, Shepherd’s Pie):
- From Thawed: Preheat oven to 350-375°F (175-190°C). Cover the dish with foil and bake for 20-30 minutes, then uncover and bake for another 10-20 minutes, or until heated through and bubbly.
- From Frozen (if safe for your dish): Some casseroles can go straight from freezer to oven. Preheat oven to a slightly lower temperature (e.g., 325°F/160°C). Cover tightly with foil and bake for 60-90 minutes, then uncover and continue baking until heated through. Always check the internal temperature.
- Soups and Stews:
- From Thawed: Transfer to a pot on the stovetop and heat over medium heat, stirring occasionally, until simmering and heated through.
- From Frozen: Place the frozen block of soup in a pot with a splash of water or broth. Heat over low-medium heat, breaking up the block as it thaws, until fully heated and simmering.
- Microwave: For individual portions, microwave in a microwave-safe bowl, stirring every minute or two, until piping hot.
- Shredded Meats (e.g., Pulled Pork, Shredded Chicken):
- From Thawed: Reheat on the stovetop in a pan, in the microwave, or in the oven until heated through. Add a splash of broth or sauce if it seems dry.
- Breakfast Items (e.g., Burritos, Muffins):
- Burritos/Sandwiches: Thaw overnight in the fridge. Reheat in the microwave (unwrapped, about 1-2 minutes) or in a toaster oven (wrapped in foil, 15-20 minutes) until warm.
- Muffins/Scones: Thaw at room temperature for 30 minutes or microwave for 30 seconds for a warm treat.
Making It Feel “Fresh”: The Finishing Touches
Sometimes, a reheated meal can feel a little… flat. A few simple additions can elevate it and make it feel like you just cooked it from scratch!
- Fresh Herbs: A sprinkle of fresh parsley, cilantro, or chives can brighten up any soup, chili, or casserole.
- A Squeeze of Citrus: A wedge of lemon or lime can add a burst of freshness to many dishes.
- Dairy Toppings: A dollop of sour cream, Greek yogurt, or a sprinkle of shredded cheese can add richness and flavor.
- Crunchy Elements: Toasted nuts, croutons, or crispy tortilla strips can add a delightful texture contrast.
- Simple Sides: Pair your freezer meal with a quickly tossed green salad, some fresh fruit, or a piece of warm bread to complete the meal.
By mastering these thawing and reheating techniques, you ensure that every freezer meal you pull out is not just convenient, but also a truly delicious and satisfying experience for your family. Enjoy the fruits of your labor!
Beyond the Basics: Advanced Tips for Freezer Meal Mastery
Once you’ve got the hang of the fundamental freezer meal strategies, you might find yourself eager to explore ways to make the system even more robust and integrated into your family’s lifestyle. These advanced tips will help you fine-tune your approach, tackle new challenges, and truly become a freezer meal maestro, empowering you to navigate parenthood with even greater culinary confidence.
Embrace Freezer Meal Swaps and Parties
One of the most joyful ways to expand your freezer stash and connect with other parents is through freezer meal swaps or parties. Gather a group of friends (especially other new or expecting parents), assign each person a different freezer-friendly recipe, and have everyone cook a large batch (e.g., 6-8 portions) of their chosen dish. Then, meet up to swap, and everyone goes home with a variety of different meals! This is a fantastic way to diversify your freezer, try new recipes, and share the cooking load. It fosters community and mutual support, which is invaluable during early parenthood.
Smart Integration with Meal Planning
Don’t view freezer meals as a separate entity; integrate them directly into your weekly meal planning. When you plan your meals for the week, slot in 2-3 freezer meals, noting which ones need to be pulled out to thaw the night before. This ensures you actually use your stash and prevents meals from getting lost in the freezer abyss. A simple whiteboard or digital app for meal planning can make this a breeze. Consider a rotating menu of your family’s favorite freezer meals to simplify decision-making.
Utilizing Ingredient Delivery Services and Prepared Components
Even with freezer meals, some weeks might feel too overwhelming for full-scale prep. Don’t hesitate to lean on modern conveniences. Grocery delivery services (like Instacart, Amazon Fresh


