


Master Your Kitchen: The Ultimate Guide to Knife Skills for Home Cooks in 2026
If you have ever watched a professional chef glide through a pile of onions with rhythmic, hypnotic precision, you know that great cooking starts long before the heat hits the pan. For many home cooks, however, the chopping block is a source of frustration rather than flow. Dull blades, improper grips, and uneven cuts don’t just slow you down—they affect the texture, flavor, and visual appeal of your meals. Mastering knife skills is the single most important technique you can develop to transform your culinary experience. It is the bridge between being someone who follows a recipe and someone who understands the craft of cooking. In 2026, as we embrace more plant-forward diets and farm-to-table sourcing, the ability to handle fresh produce with speed and safety is no longer a luxury; it is a fundamental necessity. This guide will walk you through the essential tools, safety protocols, and professional techniques required to sharpen your skills and reclaim your time in the kitchen.
1. Anatomy of the Blade: Choosing Your Core Arsenal
Before you can master the motion, you must understand the tool. A common mistake for home cooks is buying a massive 20-piece knife block, only to find that 17 of those blades never leave their slots. In reality, a well-equipped kitchen only needs three core knives to handle 95% of all tasks.
#
The Chef’s Knife (8 to 10 inches)
The workhorse of the kitchen. This knife features a curved blade that allows for a “rocking” motion, essential for mincing and dicing. Whether you prefer the heavier weight of a German-style forged blade or the razor-sharp, thinner edge of a Japanese Santoku, the Chef’s knife is your primary tool for everything from carving a chicken to dicing a squash.
#
The Paring Knife (3 to 4 inches)
Think of the paring knife as a scalpel. It is designed for intricate work that requires high control, such as peeling an apple, deveining shrimp, or removing the “eyes” from potatoes. Because it is small, it is handled primarily with the fingers rather than the whole hand.
#
The Serrated (Bread) Knife
The saw-like teeth of a serrated knife are designed to grip and tear through tough exteriors without crushing soft interiors. While obviously used for crusty sourdough, it is also the best tool for slicing ripe tomatoes or delicate citrus fruits.
**Key Anatomy Terms:**
* **The Tang:** The part of the metal blade that extends into the handle. A “full tang” knife (where the metal goes all the way to the end of the handle) offers superior balance and durability.
* **The Bolster:** The thick junction where the blade meets the handle. This provides a finger guard and adds weight for better balance.
* **The Heel:** The rear part of the blade, used for tasks that require force, like cutting through a hard butternut squash.
2. Safety First: The Grip and the “Claw”
Safety is the foundation of speed. Most kitchen accidents occur not because a knife is too sharp, but because it is too dull or because the cook lacks control over the vegetable. To gain absolute control, you must master the “Pinch Grip” and the “Claw.”
#
The Pinch Grip
Many home cooks hold a knife like a hammer, with all four fingers wrapped around the handle. This offers very little stability. Instead, use the **Pinch Grip**. Grip the handle with your bottom three fingers, then use your thumb and index finger to “pinch” the base of the blade just above the bolster. This makes the knife an extension of your arm, preventing it from wobbling side-to-side.
#
The Non-Cutting Hand: The Claw
Your non-cutting hand is the guide. To prevent nicks, curl your fingertips inward toward your palm, creating a “claw.” Rest your knuckles against the side of the blade. As you cut, the flat side of the knife should slide against your knuckles, keeping your fingertips safely tucked away. This technique allows you to feel where the blade is without having to look at your fingers constantly.
#
Stability and Environment
Never cut on a moving surface. If your cutting board slides around, place a damp paper towel or a silicone mat underneath it. Ensure your workspace is clear of clutter; a crowded board is a dangerous board.
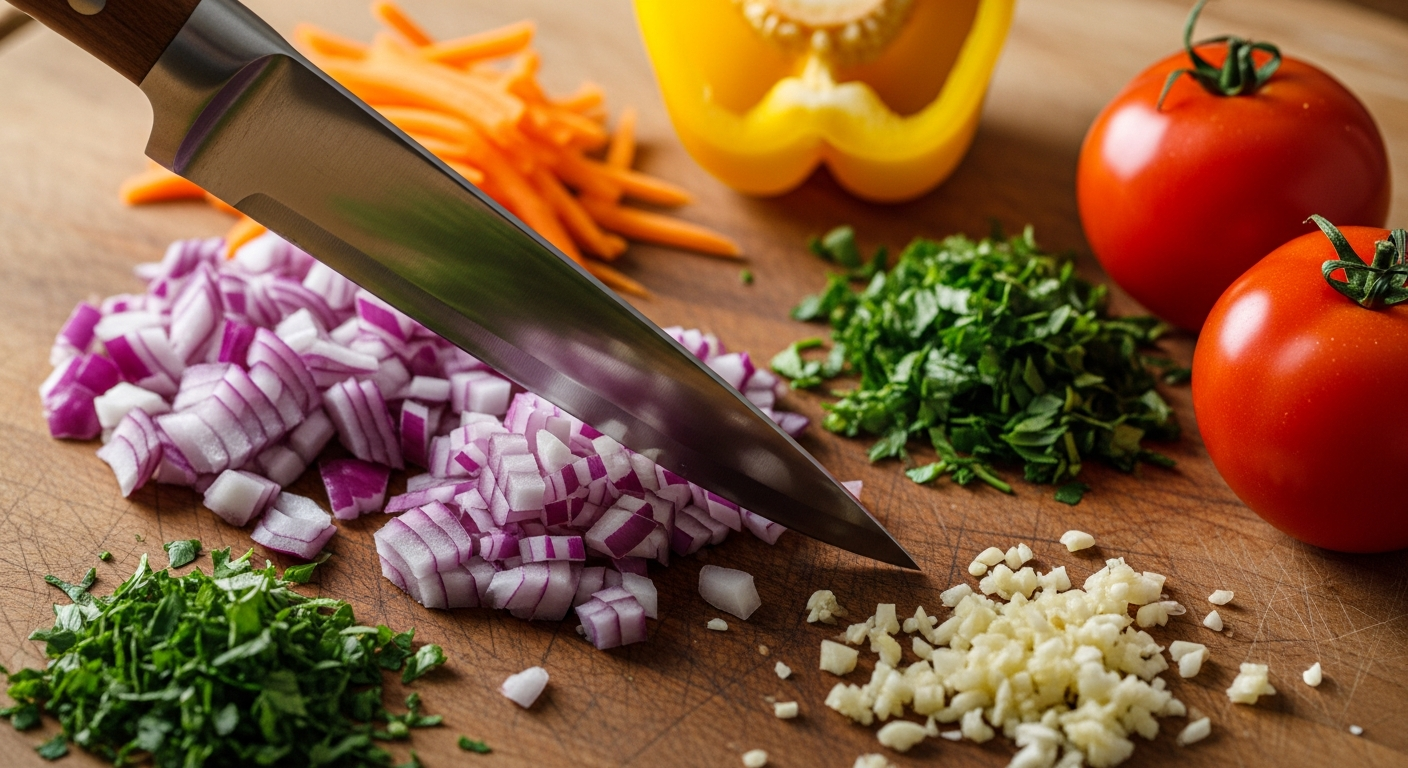
3. The Essential Cuts: From Julienne to Chiffonade
Uniformity isn’t just about aesthetics—it’s about science. If your carrot chunks are different sizes, some will turn to mush while others remain crunchy. Mastering these standard cuts ensures even cooking across the board.
#
The Dice (Large, Medium, and Small)
* **Large Dice (3/4 inch):** Used for hearty stews and slow-cooker meals.
* **Medium Dice (1/2 inch):** The standard for most sautés and soups.
* **Small Dice (1/4 inch):** Perfect for salsas or mirepoix (onion, carrot, celery) where you want the vegetables to melt into the sauce.
#
The Julienne and Batonnet
These are “matchstick” cuts. A **Batonnet** is roughly 2 inches long and 1/4 inch thick (think of a French fry). A **Julienne** is much finer, roughly 1/8 inch thick. These are ideal for stir-frys or raw garnishes in salads.
#
The Mince
Mincing is the finest cut of all, typically reserved for aromatics like garlic, ginger, and shallots. To mince effectively, use your Chef’s knife in a rocking motion, keeping the tip of the blade on the board and moving the handle up and down while pivoting across the pile of ingredients.
#
The Chiffonade
This technique is used for leafy greens and herbs like basil or kale. Stack the leaves, roll them tightly like a cigar, and then slice across the roll to create delicate, long ribbons. This prevents bruising the delicate herbs and creates a professional-grade garnish.
4. Maintenance: Honing vs. Sharpening
A dull knife is the most dangerous tool in the kitchen because it requires more pressure to cut, increasing the likelihood of the blade slipping. In 2026, with the rise of high-carbon steel and Damascus blades in home kitchens, understanding maintenance is vital.
#
Honing (The Steel)
You should hone your knife almost every time you use it. Honing doesn’t actually remove metal to create a new edge; rather, it “re-aligns” the microscopic teeth of the blade that get bent out of shape during use. Use a honing rod at a 15-to-20-degree angle to keep the edge straight and true.
#
Sharpening (The Stone)
Sharpening involves grinding away a small amount of metal to create a brand-new edge. Depending on how often you cook, you should professionally sharpen your knives (or use a whetstone at home) once or twice a year. If you find yourself having to “saw” through a tomato, it’s time for a sharpening session.
#
Cleaning and Storage
Never, under any circumstances, put your quality knives in the dishwasher. The high heat, harsh detergents, and rattling can warp the steel and dull the edge instantly. Hand-wash with warm soapy water, dry immediately, and store them on a magnetic strip or in a wooden knife block. Avoid throwing them loose into a utensil drawer, which ruins the edges and creates a safety hazard.
5. The Best Surface: Choosing Your Cutting Board
Your knife is only as good as the surface it hits. Many home cooks make the mistake of using glass, marble, or ceramic cutting boards. These materials are harder than the steel of your knife, meaning your blade will dull almost instantly upon contact.
#
Wood (The Gold Standard)
End-grain wooden boards are the choice of professionals. The wood fibers open up to “receive” the blade and then close back up, preserving the sharp edge. Wood also has natural antimicrobial properties. Remember to oil your wooden boards monthly with food-grade mineral oil to prevent cracking.
#
Plastic (The Practical Alternative)
High-density polyethylene (HDPE) boards are affordable and dishwasher-safe, making them excellent for handling raw meat and poultry to prevent cross-contamination. However, they develop deep grooves over time where bacteria can hide, so they should be replaced once they become heavily scarred.
6. Practical Drills: How to Improve Your Speed
Knife skills are a matter of muscle memory. You cannot think your way into being fast; you have to practice your way there.
* **The Onion Challenge:** Buy a five-pound bag of onions and practice dicing them all. Onions are cheap and have natural “grid lines” that make them the perfect practice subject. Focus on the grip and the claw rather than speed. Speed will come naturally as your comfort increases.
* **The Potato Batonnet:** Use potatoes to practice your geometry. Squaring off a potato to create a perfect rectangle before cutting it into batonnets helps you learn how to handle round, rolling objects safely.
* **Slow is Smooth, Smooth is Fast:** This mantra used by athletes applies to the kitchen. Focus on making every cut identical. If you can make ten identical cuts slowly, you will eventually be able to make a hundred identical cuts quickly.
FAQ: Frequently Asked Questions
**Q: How much should I spend on a good Chef’s knife in 2026?**
A: You don’t need to spend $500. A high-quality, entry-level professional Chef’s knife typically ranges from $60 to $150. Look for reputable brands that offer forged steel and a comfortable balance.
**Q: Is a Santoku better than a traditional Chef’s knife?**
A: It’s a matter of preference. A Santoku is lighter and has a flatter edge, making it excellent for “push-cutting” (straight down). A traditional Chef’s knife has a curved “belly,” which is better for “rock-cutting.” Try both in a store to see which feels more natural in your hand.
**Q: How do I know if my knife is sharp enough?**
A: The “Paper Test” is the industry standard. Hold a piece of printer paper vertically and try to slice through it with the knife. A sharp blade will slide through the paper cleanly with almost no resistance. If it tears or catches, it’s time for sharpening.
**Q: Can I use a serrated knife for vegetables?**
A: Yes, for specific ones! Serrated knives are superior for waxy or soft-skinned vegetables like tomatoes, eggplants, and peppers, as the teeth “bite” into the skin where a smooth blade might slip.
**Q: How do I stop my eyes from watering when cutting onions?**
A: The sharper your knife, the less you will cry. Crying is caused by the crushing of onion cells, which releases a gas that reacts with the moisture in your eyes. A razor-sharp blade slices through the cells instead of crushing them, significantly reducing the gas released.
Conclusion
Mastering knife skills is a journey, not a destination. In 2026, as we look toward more efficient and mindful ways of living, the ability to prepare fresh food with precision is a liberating skill. It reduces food waste, ensures your meals cook perfectly every time, and most importantly, it makes the time you spend in the kitchen enjoyable rather than a chore. By investing in the right tools, prioritizing safety with the pinch grip and the claw, and practicing your basic cuts, you are not just learning how to chop vegetables—you are learning how to master your kitchen. Put down the pre-cut, plastic-wrapped produce and pick up your Chef’s knife. The path to becoming a better cook starts at the edge of the blade.


