


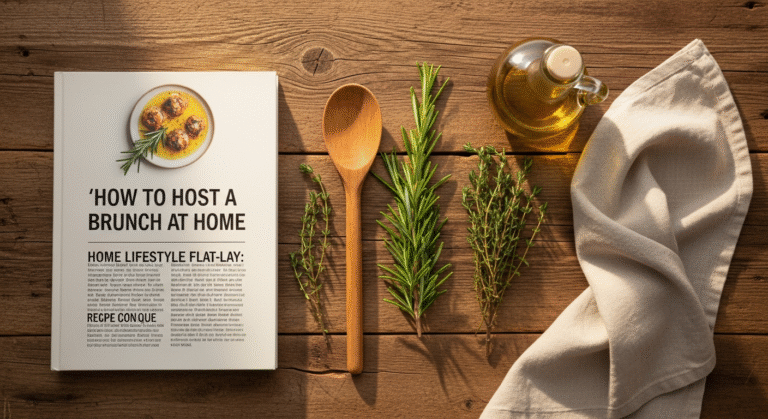


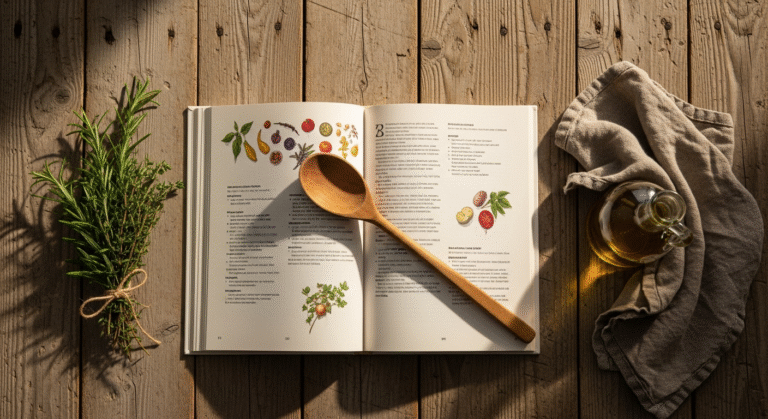


The Art of Effortless Entertaining: Your Step-by-Step Guide to Crafting a Stunning Grazing Table
Why a Grazing Table? Embracing Effortless Elegance
Before we dive into the delicious details, let’s chat about why grazing tables have become such a beloved staple in modern entertaining. They are, quite simply, a game-changer for hosts who desire both beauty and practicality.
A Feast for the Eyes and Palate
A well-executed grazing table is inherently gorgeous. It’s a visual spectacle of colors, textures, and shapes that immediately draws guests in. But beyond the aesthetics, it’s also incredibly democratic. Unlike a plated meal, a grazing table allows guests to curate their own plates, discovering new flavor combinations and returning for more of their favorites. This self-service style fosters a relaxed atmosphere, encouraging guests to mingle and interact naturally.
Less Stress, More Joy for the Host
One of the biggest advantages of a grazing table, from a host’s perspective, is the ability to prepare most elements in advance. Once the table is assembled, your work is largely done! This frees you up to enjoy your company, a cornerstone of genuine Southern hospitality. No more frantic plating or juggling hot dishes; just a beautiful, abundant spread that looks after itself. It’s about creating a memorable experience for your guests without sacrificing your own enjoyment of the party.
Versatility for Any Occasion
Whether you’re hosting a casual brunch, an elegant evening cocktail party, a baby shower, or a holiday gathering, a grazing table can be tailored to suit. Its adaptability means it can be as simple or as elaborate as your occasion demands, making it a truly versatile entertaining solution for any season or celebration.
Planning Your Edible Canvas: Theme, Size, and Guest Count

Define Your Theme and Aesthetic
This is where your creativity truly shines! Think about the occasion, the time of year, and your personal style.
* Seasonal Delights: Embrace what’s fresh and vibrant. Summer might call for bright berries and peaches, while autumn begs for figs, pomegranates, and rich cheeses.
* Color Palette: Do you want a rustic, earthy feel with deep greens and browns, or a light and airy look with pastels and bright whites? Let your linens, servingware, and even your food choices reflect this.
* Cuisine Inspiration: Perhaps a Mediterranean theme with hummus, olives, feta, and pita; or a dessert-focused “sweet grazing table” with mini pastries, chocolates, and fruits.
* Your Home’s Style: Consider your existing decor. A modern minimalist home might prefer a clean, uncluttered spread, while a cozy farmhouse might lean into abundant, rustic charm.
Guest Count and Table Dimensions
Knowing your guest count is crucial for determining how much food you’ll need and how large your table should be.
* Food Quantity: As a general rule of thumb, plan for about 4-6 ounces of food per person if the grazing table is an appetizer or accompaniment to other dishes. If it’s the main event, increase that to 8-10 ounces per person. This includes cheeses, meats, crackers, fruits, and all the delightful accoutrements. It’s always better to have a little too much than not enough – abundance is part of the grazing table’s charm!
* Table Surface: You’ll want a sturdy, clean surface. This could be your dining table, a kitchen island, a console table, or even a repurposed workbench. For larger gatherings, consider pushing two tables together.
* Protect Your Surface: Always, always protect your table! Lay down a waterproof tablecloth or a layer of butcher paper. Food-grade parchment paper is also an excellent option. This not only makes cleanup a breeze but also creates a lovely, clean backdrop for your edibles. Butcher paper is fantastic because you can write on it – perhaps labeling items or adding playful doodles!
Budget Considerations
Grazing tables can range from wonderfully affordable to luxuriously lavish.
* Savvy Shopping: Don’t feel you need to break the bank. Local farmers’ markets are a treasure trove for fresh, seasonal produce and artisanal cheeses that often cost less than grocery store equivalents. Discount stores can be great for crackers, olives, and certain dried fruits.
* Homemade Touches: Consider making your own dips (like hummus or whipped feta), candied nuts, or even a simple fruit compote. These homemade elements add a personal touch and can save money.
* Balance High-End and Everyday: Pair a few specialty cheeses or cured meats with more budget-friendly options. A beautiful wedge of Brie alongside a sharp cheddar offers variety without excessive cost.
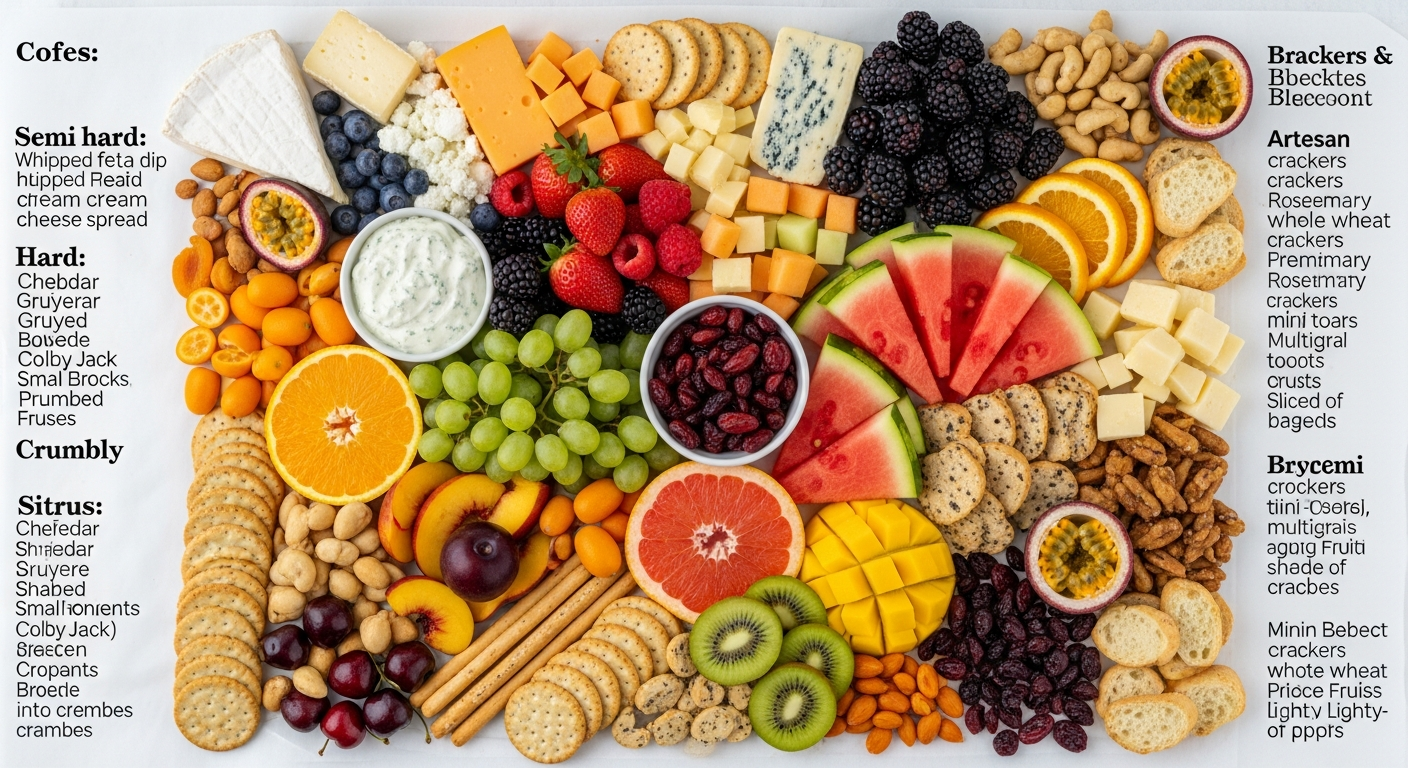
Gathering Your Gourmet Palette: The Essential Ingredients
Now for the fun part: selecting the stars of your show! The key to a truly captivating grazing table is variety – a harmonious blend of flavors, textures, and colors that invite exploration. Think about categories and aim for diversity within each.
Cheeses: The Heart of the Table
Aim for at least 3-5 different types of cheese to offer a range of flavor profiles and textures.
* Soft & Creamy: Brie, Camembert, Goat Cheese (chevre), Boursin.
* Hard & Nutty: Aged Cheddar, Gouda, Parmesan, Manchego.
* Semi-Hard & Versatile: Havarti, Gruyère, Provolone.
* Crumbly & Pungent (for the adventurous!): Blue Cheese (Gorgonzola, Roquefort).
* Presentation Tip: Take cheeses out of the fridge about 30-60 minutes before serving to allow them to come to room temperature, enhancing their flavor and texture.
Cured Meats: Savory Delights
Select 2-4 varieties of cured meats that complement your cheeses.
* Delicate & Salty: Prosciutto, Jamón Serrano.
* Spicy & Robust: Calabrese Salami, Soppressata.
* Mild & Flavorful: Genoa Salami, Mortadella.
* Folding Fun: Get creative with how you arrange them. Fan slices, roll them into elegant rosettes, or create appealing mounds.
Crackers & Breads: The Perfect Vehicles
Offer a range of textures and flavors to pair with cheeses and spreads.
* Artisanal Crackers: Water crackers, seed crackers, multigrain crackers, rice crackers.
* Fresh Bread: Sliced baguette, rustic sourdough, flatbreads, breadsticks.
* Gluten-Free Options: Be mindful of guests with dietary restrictions and include a dedicated gluten-free cracker if possible.
Fruits (Fresh & Dried): Sweetness and Color
Fruits add vibrant color, refreshing sweetness, and beautiful juiciness.
* Fresh Fruits: Grapes (various colors), berries (strawberries, raspberries, blueberries), figs (especially in season!), apple and pear slices (toss with a little lemon juice to prevent browning), orange segments, kiwi slices.
* Dried Fruits: Apricots, dates, figs, cranberries, cherries. These add a chewy texture and concentrated sweetness.
Vegetables & Dips: Freshness and Crunch
Crisp vegetables and creamy dips provide a refreshing counterpoint to richer items.
* Crudités: Carrot sticks, cucumber slices, bell pepper strips (various colors), cherry tomatoes, radishes, blanched asparagus spears, snap peas.
* Dips: Hummus, tzatziki, olive tapenade, spinach dip, whipped feta, a delicious onion dip.
* Small Pickles & Olives: Marinated olives (Kalamata, Castelvetrano), cornichons, pickled onions, pickled asparagus. These add a delightful briny tang.
Nuts & Spreads: Textural and Flavor Enhancers
These small but mighty additions elevate the entire experience.
* Nuts: Almonds (marcona, smoked), walnuts, pecans (candied pecans are a delightful touch!), pistachios, cashews.
* Spreads & Jams: Fig jam, honey (perhaps with a small honey dipper), fruit preserves, whole grain mustard, quince paste (membrillo).
Sweet Treats (Optional but Delightful!)
If you want to add a touch of confectionery charm, consider a few small sweets.
* Mini Cookies: Shortbread, amaretti.
* Chocolates: Dark chocolate squares, chocolate-covered pretzels.
* Macarons: A pop of color and delicate sweetness.
* Candied Nuts: A sweet and crunchy treat.
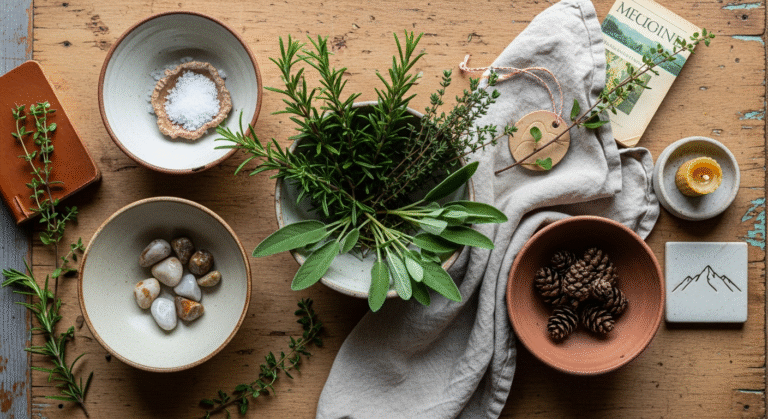
Garnishes: The Finishing Flourish
Don’t underestimate the power of fresh herbs and edible flowers.
* Fresh Herbs: Rosemary sprigs, thyme sprigs, basil leaves.
* Edible Flowers: Pansies, nasturtiums, borage.
* These add natural beauty, fragrance, and a professional touch.
Setting the Stage: Utensils, Boards, and Beautiful Details

With your delicious ingredients selected, it’s time to think about the presentation. The right servingware and decorative elements transform a simple food spread into a lavish display.
Servingware Essentials
You’ll need a variety of items to hold, serve, and present your food beautifully.
* Small Bowls & Ramekins: Essential for dips, olives, nuts, and smaller fruits. Choose varying sizes and materials (ceramic, glass, wood) for visual interest.
* Cheese Knives & Spreaders: Provide at least one knife for each type of cheese, or a dedicated set. Small spoons for jams and dips are also a must.
* Tongs & Forks: For serving meats, larger fruits, and vegetables.
* Platters & Boards: A mix of cutting boards (wood, bamboo), slate boards, and ceramic platters will add height and texture. Use larger boards as anchors for your cheese selections.
Linens and Layers
The foundation of your table contributes significantly to its overall aesthetic.
* Tablecloth or Runner: Choose something that complements your theme. A crisp white linen provides a clean backdrop, while a textured natural fiber runner adds rustic charm.
* Napkins: Provide plenty of elegant linen or high-quality paper napkins. Rolling them and placing them strategically around the table adds to the welcoming feel.
Decorative Elements and Ambiance
These are the touches that elevate your grazing table from functional to fabulous.
* Varying Heights: Use overturned bowls, small boxes, or cake stands hidden beneath your butcher paper or tablecloth to create different levels. This adds dimension and allows for more food in a smaller space, making the table feel even more abundant.
* Fresh Flowers & Greenery: Small, low floral arrangements or simple sprigs of eucalyptus or olive branches tucked between food items add organic beauty without overwhelming the display.
* Candles: If appropriate for your setting, small votives or flameless candles can cast a warm, inviting glow. Always ensure they are safely placed away from easily flammable items.
* Labels: Consider small chalkboards or elegant tent cards to label cheeses, dips, and any items that might be less obvious or could contain allergens. This is a thoughtful touch for your guests.
The Art of Assembly: A Step-by-Step Flow
Now for the grand unveiling! Assembling your grazing table is a creative process, much like painting a picture. There’s no single “right” way, but following a logical flow will ensure a balanced, beautiful, and functional spread.
Step 1: Prep Your Surface
Lay down your protective layer – butcher paper, parchment paper, or a tablecloth. If using butcher paper, secure it with tape underneath the table edges. If you’re incorporating varying heights with hidden stands, place these first.
Step 2: Anchor with Boards and Bowls
Begin by placing your largest, non-food items: your main cheese boards, large platters, and any bowls for dips, olives, or nuts. Scatter these around the table rather than lining them up in a row. These act as your “zones” and provide structure.
Step 3: Lay Down Your Cheeses
Arrange your cheeses on their designated boards. Cut some cheeses (like cheddar or gouda) into cubes or wedges, but leave others (like brie or goat cheese) whole or just partially cut to invite guests to serve themselves. Fan slices out, or cluster them appealingly.
Step 4: Arrange Cured Meats
Place your meats around the cheeses and bowls. Get creative! Fold prosciutto into delicate ribbons, roll salami slices into cones, or fan them out in overlapping lines. Don’t be afraid to let them cascade off the edges of boards.
Step 5: Add Crackers and Breads
Cluster crackers and bread slices around the cheeses and dips they might pair with. Create little “rivers” of crackers leading to a bowl of hummus, or fan out baguette slices next to a wheel of Brie. Don’t just place them in neat piles; spread them out and fill in gaps.
Step 6: Incorporate Fruits and Vegetables
This is where your table truly comes alive with color! Drape grape clusters around cheese boards, pile berries into small bowls, and scatter apple and pear slices. Tuck in your crudités next to dips. Let fresh produce spill and intertwine, filling in most of the remaining larger gaps.
Step 7: Tuck in Olives, Nuts, and Pickles
Fill your small bowls with olives, cornichons, and nuts. Place them strategically throughout the table, nestling them into open spaces between larger items. You can also create small, artful piles of nuts directly on the butcher paper.
Step 8: Drizzle and Dollop Spreads
Now add your jams, honey, and mustards. Place a small bowl of honey with a dipper near a blue cheese, or a fig jam next to goat cheese. A small dollop of spread directly on the board next to a cheese can be inviting.
Step 9: Garnish and Perfect
This is the final, magical touch! Scatter fresh herb sprigs (rosemary, thyme) and edible flowers across the table. Use them to fill any remaining small gaps, add pops of green, and make the whole display look utterly lush and inviting. Stand back, assess, and make any final adjustments to balance colors and textures.
Step 10: Don’t Forget the Essentials
Alongside your beautiful spread, ensure you have plenty of small plates, napkins, and any necessary cutlery (small forks for olives, etc.) readily available for your guests. A bottle opener or corkscrew for beverages should also be nearby.
Tips for Success & Savvy Hosting
A stunning grazing table is just the beginning. A few thoughtful hosting tips will ensure your event runs smoothly and joyfully.
Timing is Everything
While many components can be prepped in advance (washing and cutting veggies, arranging meats on platters, setting out bowls), the final assembly of your grazing table should happen as close to serving time as possible, ideally within 30-60 minutes. This ensures freshness and keeps everything looking its best.
Temperature Management
Keep perishable items like cheese and meat refrigerated until the last possible moment. If you’re hosting outdoors or in a warm environment, consider using chilled serving platters or placing ice packs beneath bowls of dips (hidden, of course!).
Replenishing Gracefully
For longer events, you might need to refresh your table. Have extra crackers, fruits, and perhaps a backup block of cheese ready to go. Rather than refilling directly, it’s often more elegant to remove a nearly empty bowl and replace it with a fresh, full one.
Accommodating Dietary Needs
Being a gracious host means considering all your guests.
* Labels: Use those small labels to identify cheeses and dips, especially if you have a vegetarian or vegan option, or if something contains nuts.
* Gluten-Free Zone: If possible, dedicate a small section or a separate board for gluten-free crackers and safe items to prevent cross-contamination.
* Nut-Free Section: For severe allergies, consider having a completely nut-free section or board, clearly labeled.
Beverage Pairings
A beautiful grazing table deserves equally delightful beverages.
* Wine: Offer a crisp white (Sauvignon Blanc, Pinot Grigio), a versatile rosé, and a light-to-medium-bodied red (Pinot Noir, Grenache).
* Sparkling: Prosecco or sparkling rosé adds a festive touch.
* Non-Alcoholic: Sparkling water with fruit slices, homemade infused water, or a delicious iced tea are always appreciated.
* Signature Cocktail: A pitcher of a refreshing, pre-made cocktail like a spritz or a punch is a lovely, low-fuss option.
Embrace Imperfection
Remember, the beauty of a grazing table lies in its organic, abundant nature. Don’t strive for sterile perfection. A slightly artful mess, a grape that’s rolled off its cluster, or a crumbly cheese adds to its charm and inviting appeal.


