


Unlock the Secret: Homemade Pizza Dough That Truly Beats Delivery Every Single Time!
You, my dear home-loving friend, are about to embark on a delightful journey into the heart of pizza making. We’re not just making pizza; we’re creating a centerpiece for cozy evenings, a canvas for your favorite toppings, and a testament to the warmth and deliciousness that only a home kitchen can provide. Forget dry, flavorless crusts or doughs that refuse to cooperate. We’re going to dive deep into the secrets of creating a homemade pizza dough that is so incredibly flavorful, so wonderfully chewy, and so perfectly crispy, it will become your new go-to. Get ready to transform your kitchen into the most coveted pizzeria in town, all with a little flour, water, yeast, and a whole lot of love.
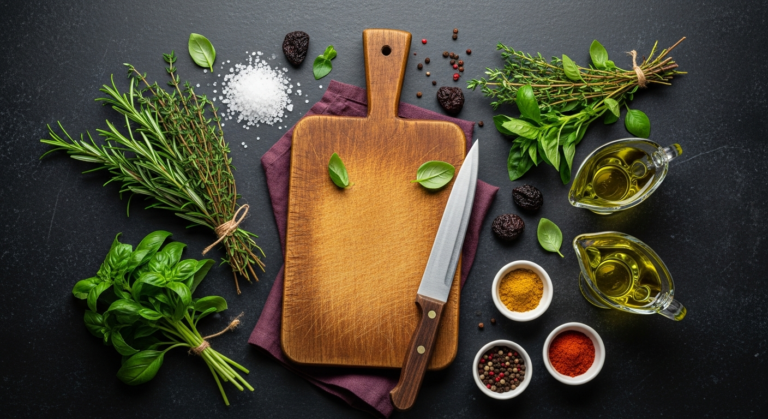
The Foundation of Flavor: Understanding Your Ingredients
Every masterpiece begins with exceptional materials, and your homemade pizza dough is no exception. Think of your ingredients not just as components, but as the building blocks of flavor, texture, and aroma that will define your ultimate pizza experience. Choosing wisely here is paramount to achieving that irresistible crust we’re aiming for.
Flour: The Soul of Your Dough
The type of flour you choose dramatically impacts the texture of your crust. It’s not just “white flour”; there’s a world of difference:
- “00” Flour (Double Zero): This is the gold standard for authentic Neapolitan-style pizza. “00” refers to how finely milled the flour is and its protein content. It’s incredibly fine, like talcum powder, and typically has a moderate protein content (around 10-12%). This results in a very soft, pliable dough that bakes into a delicate, airy crust with those beautiful characteristic blisters and a slight chew. Brands like Antimo Caputo “00” Chef’s Flour are widely available and highly recommended.
- Bread Flour: If “00” flour isn’t readily available, bread flour is your next best friend. It has a higher protein content (12-14%) compared to all-purpose flour, which means more gluten development. This extra gluten gives your dough strength and elasticity, resulting in a chewier, more substantial crust that holds up well to a variety of toppings. King Arthur Bread Flour is an excellent choice known for its consistent quality.
- All-Purpose Flour: While you *can* make pizza dough with all-purpose flour, it will yield a less chewy and potentially less flavorful crust due to its lower protein content (10-12%). It’s good for a thin, crispier crust, but if you’re aiming for that truly exceptional chew, opt for bread flour or “00”.
- Whole Wheat Flour: For a healthier, nuttier flavor, you can substitute a portion (say, 25-50%) of your white flour with whole wheat. Be aware that whole wheat flour absorbs more water and its bran can hinder gluten development, so your dough might be a bit denser and require a little more liquid.
Here’s a quick comparison of common flour types for pizza dough:
| Flour Type | Protein Content (Approx.) | Texture | Ideal Crust Style | Common Brands |
|---|---|---|---|---|
| “00” Flour | 10-12% | Very fine, silky | Soft, airy, blistered Neapolitan | Caputo, Molino Rossetto |
| Bread Flour | 12-14% | Coarse, strong | Chewy, substantial, New York-style | King Arthur, Gold Medal |
| All-Purpose Flour | 10-12% | Medium fine | Crispier, less chewy, thinner crusts | Pillsbury, General Mills |
| Whole Wheat Flour | 13-15% | Coarse, fibrous | Denser, nutty, rustic | Bob’s Red Mill, King Arthur |
Yeast: The Breath of Life
Yeast is what gives your dough its rise, its airy texture, and much of its complex flavor. There are two main types you’ll encounter:
- Active Dry Yeast: This yeast comes in granules and needs to be “activated” or “proofed” in warm water (around 105-115°F or 40-46°C) before being mixed with other ingredients. You’ll know it’s active when it becomes foamy after 5-10 minutes.
- Instant Yeast (Rapid Rise): This is a more finely milled yeast that doesn’t require proofing. You can mix it directly with your dry ingredients. It’s often preferred for its convenience and slightly faster rise time.
Both work beautifully. Just ensure your yeast is fresh; old yeast is a dough-destroyer!
Water: The Unsung Hero
Water isn’t just a solvent; it’s a critical ingredient. Use filtered water if your tap water has a strong chemical taste. The temperature is crucial for activating yeast – too cold and it won’t activate; too hot and it will kill it. Aim for lukewarm, around 95-105°F (35-40°C).
Salt: More Than Just Seasoning
Salt isn’t just for flavor; it also controls yeast activity and strengthens the gluten structure. Use fine sea salt or kosher salt. Don’t skip it!
Olive Oil: For Flavor and Texture
A good quality extra virgin olive oil adds richness, helps tenderize the crust, and contributes to that beautiful golden-brown color. A tablespoon or two is usually sufficient.
The Art of Mixing and Kneading: Hands-On or Machine-Assisted?

Now that you have your stellar ingredients, it’s time to bring them together. The mixing and kneading process is where the magic of gluten development truly happens, transforming sticky ingredients into a smooth, elastic dough that’s a joy to work with.
Method 1: The Stand Mixer Maestro (Recommended for Convenience)
If you own a stand mixer, particularly a robust one like a KitchenAid Artisan or Professional series with a dough hook attachment, this method will save your arms and ensure consistent results.
- Activate Yeast (if using active dry): In the mixer bowl, combine your warm water and yeast. Let it sit for 5-10 minutes until foamy. If using instant yeast, you can skip this step and add it directly with the flour.
- Combine Dry Ingredients: In a separate bowl, whisk together your flour and salt.
- Mix: Add the flour mixture and olive oil to the yeast mixture in the stand mixer bowl. Attach the dough hook.
- Knead: Start the mixer on low speed (setting 2 on a KitchenAid) until the ingredients just come together, forming a shaggy dough. Increase the speed to medium-low (setting 3-4) and knead for 8-10 minutes. The dough should gather around the hook, pull away from the sides of the bowl, and become smooth, elastic, and slightly tacky to the touch. It shouldn’t be overly sticky.
- Adjust if Needed: If the dough seems too wet and sticky, add a tablespoon of flour at a time. If it’s too dry and stiff, add a teaspoon of water.
Method 2: The Therapeutic Hand Knead (Embrace the Process!)
There’s something incredibly satisfying and meditative about kneading dough by hand. It connects you directly to your food and is a wonderful stress reliever.
- Activate Yeast (if using active dry): In a large mixing bowl, combine warm water and yeast. Let it sit for 5-10 minutes until foamy.
- Combine Dry Ingredients: Add about two-thirds of your flour, salt, and olive oil to the yeast mixture. Mix with a wooden spoon or your hands until a shaggy dough forms.
- Turn Out and Knead: Turn the dough out onto a lightly floured clean surface. Begin kneading. The initial stage will be sticky and messy – don’t worry! Gradually incorporate the remaining flour, a little at a time, until the dough is manageable.
- The Kneading Technique: Push the dough away from you with the heels of your hands, fold it back over itself, give it a quarter turn, and repeat. Continue this motion for 10-15 minutes. Your goal is to develop the gluten, making the dough smooth, elastic, and springy. It should be able to stretch without tearing easily.
- Windowpane Test: A good way to check for sufficient kneading is the “windowpane test.” Pinch off a small piece of dough and gently stretch it. If you can stretch it thin enough to see light through it without it tearing, your gluten is well-developed.
Regardless of your method, the goal is the same: a smooth, elastic dough that is slightly tacky but not sticky. This is the foundation upon which your incredible pizza crust will be built!
The Magic of Fermentation: Proofing for Perfection
Once your dough is beautifully kneaded, it’s time for the yeast to truly shine. Fermentation, or “proofing,” is the process where the yeast consumes sugars in the flour, producing carbon dioxide gas and alcohol. This gas creates those wonderful air pockets, giving your crust its light, airy texture and characteristic chew, while the alcohol contributes to the dough’s complex flavor profile. Patience is your best ingredient here.
The First Rise (Bulk Fermentation)
This is where the dough roughly doubles in size.
- Prepare the Bowl: Lightly coat a large bowl (preferably glass or ceramic) with a thin layer of olive oil.
- Place the Dough: Transfer your kneaded dough to the oiled bowl, turning it once to coat all sides with oil. This prevents it from drying out.
- Cover: Tightly cover the bowl with plastic wrap or a clean, damp kitchen towel.
- Proofing Environment:
- Warm Spot (Room Temperature): Place the bowl in a warm, draft-free spot in your kitchen. This could be near a sunny window (but not in direct, hot sun), on top of a warm oven (turned off, but residual heat from recent cooking), or even inside a slightly warmed oven (turn it on for a minute, then turn off, leaving the light on). The ideal temperature is around 75-80°F (24-27°C).
- Proofing Time: At room temperature, this typically takes 1 to 1.5 hours, or until the dough has doubled in size.
You’ll know it’s ready when you can gently poke two fingers into the dough, and the indentations slowly spring back but don’t disappear completely.
The Second Rise (Cold Fermentation – Optional but Highly Recommended!)
For truly superior flavor and texture, a cold ferment in the refrigerator is a game-changer. This slow rise allows the yeast to work more slowly, developing deeper, more complex flavors, similar to a sourdough. It also makes the dough easier to handle.
- Divide and Shape: After the first rise, gently punch down the dough to release the gas. Turn it out onto a lightly floured surface and divide it into the number of pizza balls you desire (typically 2-4, depending on pizza size). Gently shape each piece into a taut ball.
- Prepare for Fridge: Place each dough ball into its own lightly oiled container or a zip-top bag, ensuring there’s room for expansion. Seal tightly.
- Refrigerate: Place in the refrigerator for at least 24 hours, and up to 3-5 days. The longer it ferments, the more flavor it develops.
- Bringing to Room Temperature: When you’re ready to make pizza, remove the dough balls from the refrigerator 1-2 hours before you plan to bake. Let them come to room temperature, loosely covered, on a lightly floured surface. This makes them much easier to stretch.
Embrace the proofing process. It’s where the dough truly comes alive, developing the character and structure that will make your pizza crust unforgettable. Resist the urge to rush it!
Shaping Your Masterpiece: From Ball to Beautiful Crust

Now comes the moment of truth – transforming your perfectly proofed dough ball into the ideal canvas for your toppings. This step can feel intimidating, but with a gentle hand and a little practice, you’ll be shaping professional-looking crusts in no time. Remember, perfection isn’t the goal; deliciousness is!
Essential Prep for Shaping:
- Room Temperature Dough: Ensure your dough has come to room temperature (if cold fermenting) for at least an hour or two. Cold dough is stiff and difficult to stretch.
- Dusting Flour/Semolina: Have a small bowl of flour (or even better, fine semolina flour or cornmeal) ready. Dust your work surface lightly – just enough to prevent sticking, not so much that it dries out the dough. Semolina or cornmeal on your peel also helps prevent sticking when transferring to the oven.
- Gentle Hands: The key to shaping is to be gentle. You’ve worked hard to build that beautiful gluten structure and those airy bubbles; don’t crush them!
Shaping Techniques:
Method 1: The Hand-Stretching Artisan (Recommended for Neapolitan Style)
This method focuses on using gravity and your hands to gently coax the dough into shape, preserving its airy structure and creating that desirable irregular, bubbly crust.
- Start with a Ball: Place a dough ball on your lightly floured surface.
- Dimple from the Center: Using your fingertips, gently press outwards from the center of the dough, leaving a small rim (the future crust) untouched around the edge. Avoid pressing the edges directly.
- Stretch and Rotate: Once you have a small disk, pick it up and drape it over the backs of your knuckles. Let gravity do the work, gently rotating the dough and allowing it to stretch. You can also lightly tug at the edges to encourage expansion.
- Continue until Desired Size: Continue stretching and rotating until your pizza is the desired size (typically 10-12 inches for a single serving). Aim for an even thickness, except for the slightly thicker rim. Don’t worry if it’s not a perfect circle; rustic charm is part of the appeal!
Method 2: The Rolling Pin Helper (For Thinner, Crispier Crusts)
If you prefer a uniformly thin crust or find hand-stretching challenging, a rolling pin is a perfectly valid tool. Just be aware it can deflate some of the air bubbles.
- Dust and Flatten: Place your dough ball on a lightly floured surface and gently flatten it with your hands.
- Roll from Center Out: Using a rolling pin, start from the center and roll outwards, rotating the dough frequently to maintain a circular shape.
- Even Pressure: Apply even pressure, working towards your desired thickness. Again, you can leave a slightly thicker edge if you want a raised crust.
- Avoid Overworking: Roll just enough to get the size and thickness you want. Overworking can make the dough tough.
Transferring Your Shaped Dough:
Once your dough is shaped, immediately transfer it to your prepared pizza peel or baking sheet. Generously dust your peel with semolina flour or cornmeal to ensure the dough slides off easily into the hot oven. This is a critical step to prevent frustration!
You’ve now created the perfect canvas. The next step is to adorn it with your favorite flavors!
Pre-Bake Prep and Topping Strategies: Building Your Dream Pizza
With your beautifully shaped dough ready, it’s time for the creative part: building your pizza! This stage is all about balance – combining flavors and textures while ensuring your crust remains the star. Thoughtful topping application prevents common pitfalls like a soggy center or uneven cooking.
The Sauce: A Flavorful Foundation
Less is often more when it comes to pizza sauce. Too much sauce can make your crust soggy and overpower your other toppings.
- Classic Tomato: A simple crushed tomato sauce (like San Marzano tomatoes, lightly seasoned with salt, a pinch of sugar, and fresh basil) is often the best. Brands like Muir Glen Organic Crushed Tomatoes also make a fantastic base.
- White Sauce: A garlic-infused olive oil base, a béchamel, or even a ricotta spread can provide a delicious alternative.
- Pesto: For a vibrant, herb-packed flavor, a thin layer of basil pesto can be incredible.
- Application: Use the back of a spoon to spread your chosen sauce thinly and evenly, leaving about a 1/2 to 1-inch border around the edge for your crust.
Cheese: The Melty Heart of the Pizza
The right cheese (or cheeses!) provides richness, flavor, and that irresistible gooey pull.
- Low-Moisture Mozzarella: This is the workhorse of pizza cheese. Look for blocks of whole milk, low-moisture mozzarella (like Polly-O or Galbani) and grate it yourself. Pre-shredded varieties often contain anti-caking agents that can affect melt and texture.
- Fresh Mozzarella: For a true Neapolitan experience, fresh mozzarella (buffalo or cow’s milk) adds a creamy, milky flavor. Tear it into small pieces and pat it dry to remove excess moisture, which can make your pizza watery. Add it sparingly.
- Parmesan/Pecorino Romano: A sprinkle of a hard, salty cheese adds a sharp, savory kick.
- Provolone: Can add a slightly sharper, nuttier flavor when blended with mozzarella.
- Layering: Apply your cheese evenly, but don’t overdo it. A good rule of thumb is that you should still see some sauce peeking through.
Toppings: Your Culinary Canvas
This is where your creativity truly shines! However, a few guidelines will ensure success:
- Don’t Overload: This is the golden rule. Too many toppings create a heavy, soggy pizza that won’t cook evenly. Aim for 3-5 toppings, including cheese and sauce.
- Prep Your Toppings:
- Cook Meats: Any raw meats (sausage, bacon, chicken) should be pre-cooked before going on the pizza.
- Sauté Veggies: High-moisture vegetables like mushrooms, onions, or bell peppers benefit from a quick sauté or roast beforehand to remove excess water and intensify their flavor. Otherwise, they can release water on your pizza, making it soggy.
- Thin Slices: Slice vegetables and cured meats thinly to ensure they cook through quickly and evenly.
- Distribution: Spread your toppings evenly across the pizza. This ensures every bite is balanced and helps the pizza cook uniformly.
- Delicate Toppings: Fresh herbs (basil, arugula), a drizzle of high-quality olive oil, or a sprinkle of flaky sea salt are best added *after* the pizza comes out of the oven to preserve their freshness and flavor.
By thoughtfully preparing and applying your toppings, you’re not just assembling a meal; you’re crafting a harmonious culinary experience that celebrates the incredible crust you’ve created.
Baking Brilliance: Achieving That Crispy, Chewy Crust
You’ve nurtured your dough, perfected your toppings, and now it’s time for the grand finale: baking! This is where your homemade pizza dough transforms into that golden, crispy, chewy masterpiece that truly beats delivery. The key to success lies in high heat and proper technique.
The Power of High Heat:
Pizza ovens reach incredibly high temperatures, cooking a pizza in mere minutes. We want to replicate this as closely as possible in a home oven to achieve a crispy exterior and a cooked-through interior without drying out the dough.
- Preheat Your Oven: This is non-negotiable. Preheat your oven to its highest possible temperature, usually 500-550°F (260-290°C).
- Use a Pizza Stone or Steel:
- Pizza Stone: A ceramic or cordierite pizza stone (like those from Old Stone Oven or Emile Henry) absorbs and retains heat, providing a direct, intense heat source to the bottom of your pizza. This creates a wonderfully crispy bottom crust. Place the stone on the middle or lower rack of your oven.
- Pizza Steel: Even better, a pizza steel (such as those from NerdChef or The Baking Steel) conducts heat more efficiently and retains it even better than a stone. This results in an even crispier crust and faster cooking times.
Place your stone or steel in the oven *before* preheating and let it heat up for at least 45 minutes to an hour. This ensures it’s thoroughly saturated with heat.
- No Stone/Steel? No Problem: If you don’t have a stone or steel, you can use an inverted heavy-duty baking sheet. Place it in the oven during preheating as well. While it won’t yield quite the same results, it’s still far superior to baking on a cold pan.
The Transfer Technique:
Getting your topped pizza from the peel into the scorching hot oven can be intimidating, but with practice, it becomes second nature.
- Prepare Your Peel: Ensure your pizza peel is generously dusted with semolina flour or cornmeal. This acts like tiny ball bearings, allowing the pizza to slide smoothly.
- Build Quickly: Assemble your pizza directly on the prepared peel. Work quickly so the dough doesn’t stick.
- The “Shimmy”: Once topped, give the peel a gentle shake to ensure the pizza isn’t sticking. If it is, lift the edge and dust more semolina underneath.
- The Launch: Open the oven door, position the tip of the peel just above the hot stone/steel, and with a confident, swift forward and backward motion, slide the pizza off the peel and onto the hot surface. It takes a little practice, but you’ll get the hang of it!
Baking Time:
Baking times will vary depending on your oven’s temperature, your stone/steel, and the thickness of your crust and toppings. Generally, a pizza baked at 500-550°F will cook in:
- 6-10 minutes on a pizza steel.
- 8-15 minutes on a pizza stone.
- 12-20 minutes on a baking sheet.
Keep a close eye on it! The crust should be golden brown, the cheese bubbly and slightly browned in spots, and any fresh mozzarella should be melted and glistening. If your oven has a broiler, a quick blast for the last minute can help achieve those beautiful charred spots on the crust.
The Finish:
Once baked to perfection, use your pizza peel to carefully remove the pizza from the oven. Transfer it to a cutting board. Let it rest for 1-2 minutes before slicing. This allows the cheese to set slightly, preventing it from sliding off, and makes for cleaner cuts. Garnish with fresh basil or a drizzle of olive oil if desired.
Congratulations! You’ve just pulled off a pizza that will make every delivery driver jealous. Savor every crispy, chewy bite of your homemade masterpiece.
Beyond the Basic: Creative Dough Variations and Storage Tips
Once you’ve mastered the classic homemade pizza dough, a world of culinary exploration opens up! Don’t be afraid to experiment and personalize your dough to suit your tastes and needs. Plus, knowing how to store your dough ensures you’re always ready for an impromptu pizza night.
Dough Variations to Try:
- Herb-Infused Dough: Knead dried Italian herbs (oregano, basil, thyme), garlic powder, or even a pinch of red pepper flakes directly into your dough during the mixing stage. This adds an aromatic layer of flavor to your crust.
- Whole Wheat Blends: For a healthier, nuttier, and more rustic crust, replace 25-50% of your all-purpose or bread flour with whole wheat flour. Remember, whole wheat absorbs more water, so you might need to adjust liquid slightly. It also tends to produce a denser crust.
- Sourdough Pizza Dough: If you’re a sourdough enthusiast, using your active sourdough starter instead of commercial yeast will yield an incredibly flavorful, tangy crust with a beautiful chew. This requires a bit more planning and understanding of sourdough baking, but the results are phenomenal.
- Gluten-Free Options: While a topic in itself, many excellent gluten-free pizza flour blends are available (e.g., Bob’s Red Mill Gluten Free Pizza Crust Mix). These often require slightly different hydration levels and handling, but can still produce delicious results for those with dietary restrictions.
- Beer Dough: Substitute a portion of the water with your favorite beer (a light lager or ale works well). The beer adds a subtle malty flavor and helps tenderize the dough.
Storage Solutions for Your Dough:
Having pre-made dough on hand is a true luxury, making weeknight pizza a breeze.
- Refrigeration (Cold Ferment): As discussed, dough can be stored in the refrigerator for 3-5 days in an airtight, lightly oiled container or zip-top bag. This actually *improves* its flavor. Remember to bring it to room temperature before shaping.
- Freezing Dough Balls:
- After the first rise, gently punch down the dough and divide it into individual pizza balls.
- Lightly oil each dough ball and place them on a baking sheet lined with parchment paper.
- Freeze until solid (1-2 hours).
- Once frozen, transfer the dough balls to individual freezer-safe bags or an airtight container. This prevents them from sticking together.
- They can be stored in the freezer for up to 2-3 months.
- To Thaw: Transfer a frozen dough ball to the refrigerator the night before you plan to use it. Then, on pizza day, remove it from the fridge 2-3 hours before shaping to allow it to come to room temperature and relax.
- Par-Baking Crusts:
If you want super-fast pizza, you can par-bake your crusts. This is great for meal prepping.
- Shape your dough into individual crusts.
- Bake on your pizza stone/steel or baking sheet in a hot oven (around 400°F/200°C) for 5-7 minutes, until lightly set but not browned.
- Remove from oven, let cool completely.
- Stack the par-baked crusts with parchment paper in between and store in an airtight container or freezer bag in the fridge for a few days, or freeze for up to a month.
- To Use: Top the par-baked crust directly from the fridge/freezer and bake as usual at high heat until golden and bubbly.
By exploring these variations and mastering storage techniques, you’ll ensure that the joy of homemade pizza is always just a few steps away, ready to brighten any mealtime.
Elevating the Experience: Pairing Your Pizza with Home Comforts
Creating homemade pizza is more than just a culinary feat; it’s an opportunity to curate an entire evening of warmth, connection, and comfort within your beautiful home. At rocksaltplum.com, we believe in embracing the “home and lifestyle” aspect of every dish, transforming a simple meal into a cherished memory. Your incredible homemade pizza dough is the star, but the supporting cast of home comforts truly makes the night unforgettable.
Setting the Scene: Ambiance is Everything
Think beyond just the food. How can you make your pizza night an experience for all the senses?
- Lighting: Dim the overhead lights and light some candles. The soft glow


