


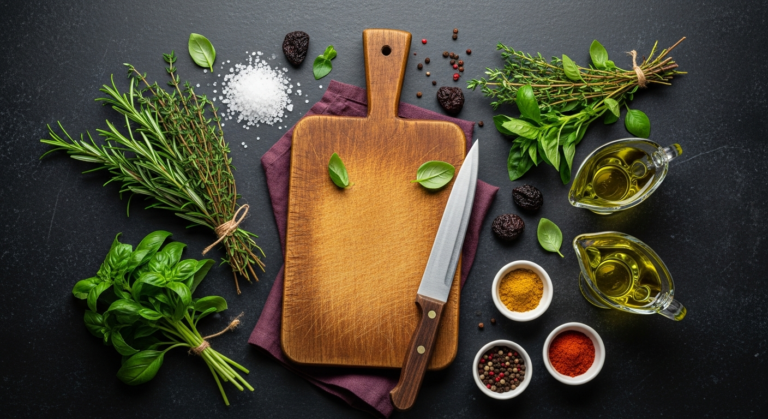


Crafting Creamy Goodness: Your Guide to Homemade Yogurt Equipment and Cost
Why Embrace Homemade Yogurt: A Touch of Wholeness for Your Home
Before we dive into the nitty-gritty of equipment and costs, let’s pause to appreciate the profound benefits that homemade yogurt brings to your life and your home. It’s more than just a food; it’s a lifestyle choice that resonates with the values of a mindful homemaker. When you make yogurt, you’re not just saving money; you’re investing in:
- Unrivaled Freshness and Flavor: There’s a distinct, vibrant taste to freshly made yogurt that often surpasses commercial varieties. You control the tanginess, the thickness, and the overall texture, tailoring it perfectly to your palate.
- Complete Ingredient Control: Say goodbye to added sugars, thickeners, stabilizers, and artificial flavors. You choose the milk, the culture, and any natural flavorings, ensuring a pure, wholesome product for your family.
- Boosted Probiotic Power: Homemade yogurt, especially when made with high-quality starter cultures, can boast a higher concentration and wider variety of beneficial bacteria, supporting gut health and overall well-being.
- Cost-Effectiveness in the Long Run: While there’s an initial investment in equipment, the ongoing cost of making yogurt at home is significantly lower than purchasing premium store-bought brands, especially if you consume it regularly.
- A Sense of Accomplishment and Connection: There’s a deep satisfaction in creating something nourishing from scratch. It connects you to traditional culinary arts and adds a layer of warmth and self-sufficiency to your home.
- Reduced Waste: By making your own, you can significantly reduce plastic waste from single-serving containers, aligning with a more sustainable and eco-conscious lifestyle.
Embracing homemade yogurt is a beautiful way to infuse your kitchen with purpose and your family’s diet with purity. It’s a simple luxury that truly enriches your home life.
The Essential Ingredients: More Than Just Milk and Magic

The beauty of yogurt lies in its simplicity. At its core, you only need two ingredients. However, the quality and type of these ingredients play a crucial role in the final product’s taste and texture. Let’s explore them:
1. Milk: The Foundation of Your Yogurt
The type of milk you choose will heavily influence the creaminess and richness of your homemade yogurt. Experiment to find your favorite!
- Whole Milk: This is the gold standard for rich, creamy yogurt. The higher fat content contributes to a luxurious texture and fuller flavor. Organic whole milk often yields the best results.
- 2% or Low-Fat Milk: You can certainly use these, but your yogurt will be thinner and less rich. To compensate, some home cooks add a tablespoon or two of milk powder per quart to thicken it.
- Skim Milk: While possible, skim milk yogurt will be very thin, more akin to a drinking yogurt. Again, milk powder can help.
- Goat Milk: Offers a distinct, tangy flavor and slightly thinner consistency. It’s a wonderful option for those seeking an alternative to cow’s milk.
- Sheep Milk: Known for producing incredibly thick, rich, and naturally sweet yogurt, often favored for Greek-style preparations.
- Non-Dairy Milks: Almond, soy, and coconut milk can be used, but they require specific non-dairy starter cultures and often additional thickeners (like agar-agar or tapioca starch) to achieve a yogurt-like consistency, as they lack the natural proteins that cow’s milk has to curdle effectively. This guide primarily focuses on dairy yogurt, but the principles of incubation remain similar.
Always opt for fresh, pasteurized milk. Ultra-pasteurized (UHT) milk can sometimes result in thinner yogurt due to its intense heat treatment, which can alter milk proteins. If using UHT, you might need to add milk powder for thickness.
2. Starter Culture: The Heart of the Transformation
This is where the magic happens! A starter culture contains the beneficial bacteria (probiotics) that ferment the lactose in milk, turning it into yogurt. You have a few options:
- Plain Store-Bought Yogurt: The easiest and most common starter. Look for a brand that explicitly states “live and active cultures” on the label. A good quality, plain Greek yogurt like Fage Total Plain or Chobani Plain works beautifully. You’ll typically need 2-3 tablespoons per quart of milk.
- Freeze-Dried Starter Culture: Available online or in health food stores, these packets contain specific strains of bacteria designed for yogurt making. They offer consistency and can often be “re-cultured” (used to start subsequent batches) many times. Brands like Cultures for Health or Yogourmet are popular.
- Heirloom Starter Culture: These are unique cultures that can be perpetually re-cultured, meaning you never have to buy new starter once you have it. Varieties like Viili (ropy, mild), Matsoni (mild, custard-like), or Filmjölk (tangy, drinkable) offer distinct flavors and textures. They are often shared within communities of home fermenters.
Remember, always use plain, unflavored yogurt as your starter. Flavored yogurts contain sugars and additives that can interfere with the fermentation process.
Choosing Your Yogurt-Making Method: A Culinary Adventure
The beauty of making yogurt at home is the flexibility in methods. You can go as high-tech or as low-tech as you like, depending on your kitchen tools and your comfort level. Each method essentially provides a warm, stable environment for the bacteria to thrive. Here’s a comparison of popular approaches:
| Method | Key Equipment Needed | Pros | Cons | Estimated Initial Cost (Equipment) |
|---|---|---|---|---|
| Basic Stovetop & Insulated Cooler/Oven Light | Large pot, thermometer, whisk, jars, towel/cooler/oven | Minimal initial investment, uses existing kitchen items, great for beginners. | Requires more active monitoring, temperature stability can vary, less precise. | $15 – $50 (if you need a good thermometer/jars) |
| Slow Cooker Method | Slow cooker (with “warm” setting), pot, thermometer, jars | Relatively hands-off incubation, good temperature control, many already own a slow cooker. | Can be bulky, warm setting might be too hot for some slow cookers, requires testing. | $0 – $70 (if you need a slow cooker) |
| Instant Pot (or Multi-Cooker) Method | Instant Pot with “Yogurt” function, pot, thermometer, jars | Extremely convenient, precise temperature control, fully hands-off incubation, popular appliance. | Requires specific Instant Pot model, initial cost of appliance can be higher. | $0 – $120 (if you need an Instant Pot) |
| Dedicated Electric Yogurt Maker | Electric yogurt maker (e.g., Euro Cuisine, Cuisinart), thermometer, jars | Designed for purpose, excellent temperature stability, often comes with jars, compact. | Single-use appliance, can be limited in batch size, another item to store. | $40 – $100 |
| Sous Vide Method | Sous Vide Immersion Circulator, large pot/container, thermometer, jars/bags | Unparalleled temperature precision, consistent results, hands-off once set. | Requires specific sous vide equipment, can be a higher initial investment, water bath setup. | $80 – $200 (if you need a circulator) |
As you can see, you likely already have some of the tools needed for the more basic methods. Don’t feel pressured to buy a dedicated appliance right away! Start simple, and if you fall in love with homemade yogurt (which you likely will!), then consider upgrading.
Deep Dive into Equipment: What You’ll Absolutely Need (And What’s Nice to Have)

Regardless of the method you choose, a few core pieces of equipment are universally helpful, if not essential. Let’s break down your kitchen toolkit for yogurt success.
The Non-Negotiables (Essentials)
- Large, Heavy-Bottomed Pot: For heating your milk. A 3-4 quart stainless steel pot is ideal for standard batches (1/2 gallon milk). The heavy bottom prevents scorching.
- Brand Example: Cuisinart Multiclad Pro, All-Clad, or any sturdy stainless steel pot you already own.
- Accurate Thermometer: This is arguably the most critical tool. You need to heat the milk to specific temperatures and then cool it down. A good instant-read digital thermometer or a candy thermometer is essential.
- Brand Example: ThermoPro TP19, OXO Good Grips Digital Instant Read Thermometer.
- Whisk or Spoon: For stirring the milk as it heats and incorporating the starter culture. A silicone whisk is gentle on non-stick surfaces, but stainless steel is fine for stainless pots.
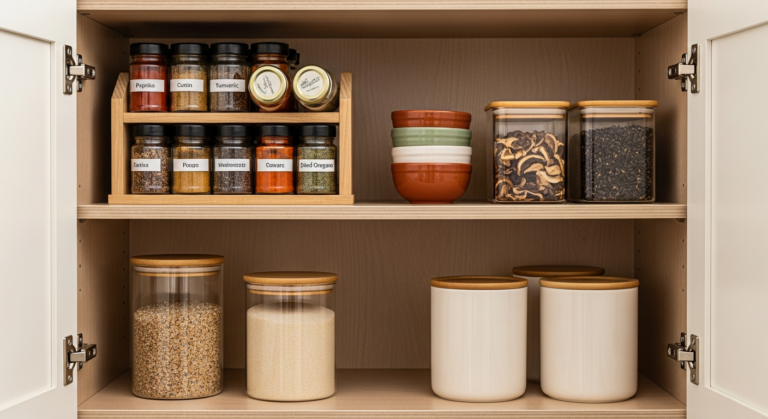
- Sterilized Jars or Containers: For incubating and storing your finished yogurt. Glass canning jars (pint or quart size) with lids are perfect. You’ll need enough to hold your batch.
- Brand Example: Ball, Kerr canning jars.
- Clean Kitchen Towels: For covering your pot during cooling and for insulating during incubation (if using a low-tech method).
The “Nice-to-Haves” (Convenience & Upgrades)
- Fine-Mesh Strainer and Cheesecloth/Nut Milk Bag: If you love thick, Greek-style yogurt, this is a must-have. You’ll use it to strain off the whey after fermentation.
- Brand Example: RSVP Endurance Fine Mesh Strainer, Bellemain Premium Quality Stainless Steel Fine Mesh Strainers.
- Instant Pot with “Yogurt” Function: As discussed, this makes the incubation step incredibly easy and precise. Models like the Instant Pot Duo Evo Plus or Instant Pot Ultra are popular choices.
- Dedicated Electric Yogurt Maker: These compact appliances are designed specifically for maintaining the ideal incubation temperature. They often come with individual serving jars.
- Brand Example: Euro Cuisine YM80 (comes with 7 glass jars), Cuisinart CYM-100 Electronic Yogurt Maker.
- Sous Vide Immersion Circulator: For the ultimate in temperature precision during incubation. You’ll need a large pot or container to hold the water bath.
- Brand Example: Anova Culinary Sous Vide Precision Cooker, Joule by Breville.
- Large Bowl for Ice Bath: Speeds up the cooling process, which is important for preventing unwanted bacteria growth and achieving a good texture.
- Silicone Spatula: Great for scraping down the sides of the pot and ensuring no milk is wasted.
When selecting equipment, think about the aesthetic of your kitchen. High-quality stainless steel, beautiful glass jars, and well-designed appliances like the Instant Pot can all contribute to a feeling of calm and purpose in your culinary space. Choose items that you’ll enjoy using and that fit seamlessly into your home’s style.
Breaking Down the Costs: An Investment in Wellness
Understanding the financial aspect is key to making an informed decision about homemade yogurt. Let’s look at both the initial equipment investment and the ongoing ingredient costs.
Initial Equipment Costs:
This will vary significantly depending on what you already own and the method you choose.
- Basic Method (Stovetop & Oven/Cooler):
- Large Pot: $0 – $40 (if you need to buy one, otherwise free)
- Thermometer: $15 – $30
- Glass Jars (6-8 pint jars): $15 – $25
- Whisk/Spoon: $0 – $10
- Estimated Total: $30 – $105
- Instant Pot Method:
- Instant Pot with Yogurt Function: $80 – $150 (if you don’t already own one)
- Thermometer: $15 – $30
- Glass Jars: $15 – $25
- Estimated Total: $110 – $205
- Dedicated Yogurt Maker Method:
- Electric Yogurt Maker: $40 – $100 (often includes jars)
- Thermometer: $15 – $30
- Estimated Total: $55 – $130
- Sous Vide Method:
- Sous Vide Immersion Circulator: $80 – $200
- Large Container/Pot: $0 – $30
- Thermometer: $15 – $30
- Glass Jars: $15 – $25
- Estimated Total: $110 – $285
As you can see, you can start very affordably. The “Basic Method” requires minimal new purchases for most well-equipped kitchens.
Ongoing Ingredient Costs (Per Batch of 1/2 Gallon Yogurt):
Let’s assume you’re making a 1/2 gallon (2 quarts) batch, which yields roughly 6-8 servings depending on thickness.
- Milk:
- 1/2 Gallon Organic Whole Milk: $4.00 – $6.00
- 1/2 Gallon Conventional Whole Milk: $2.50 – $4.00
- Starter Culture:
- 2-3 tbsp Store-Bought Plain Yogurt: ~$0.50 – $1.00 (based on a larger container cost)
- Freeze-Dried Starter Packet: $1.00 – $2.00 per batch (initial packet cost $8-$15 for multiple batches)
- Heirloom Starter: Essentially free after initial acquisition.
- Optional Additions (e.g., milk powder for thickness): $0.20 – $0.50
Estimated Ingredient Cost per 1/2 Gallon Batch: $3.00 – $7.50
Cost Comparison: Homemade vs. Store-Bought
Let’s compare this to buying premium plain yogurt at the store. A 32 oz (1 quart) container of organic whole milk plain yogurt can range from $4.50 to $7.00. So, 1/2 gallon (2 quarts) would cost $9.00 – $14.00.
Savings per 1/2 Gallon Batch: $1.50 – $11.00
If you make yogurt once a week, you could save anywhere from $78 to $572 per year after the initial equipment investment. The more you make, the more substantial the savings become, making homemade yogurt a truly economical choice for a health-conscious home.
Mastering the Process: Step-by-Step for Success
Making yogurt is a straightforward process once you understand the key steps. Precision in temperature is your best friend here. Let’s walk through it:
The Universal Steps:
- Sterilize Your Equipment: Cleanliness is paramount to prevent unwanted bacteria from spoiling your yogurt. Wash your pot, thermometer, whisk, and jars thoroughly with hot, soapy water. For jars, you can also run them through a hot dishwasher cycle or dip them in boiling water.
- Heat the Milk: Pour your milk into your heavy-bottomed pot. Heat it slowly over medium heat, stirring occasionally to prevent scorching, until it reaches 180°F (82°C). This step pasteurizes the milk further and denatures the proteins, which helps create a thicker yogurt. Don’t let it boil rapidly.
- Tip: For even thicker yogurt, hold the milk at 180°F (82°C) for 10-20 minutes, stirring frequently.
- Cool the Milk: This is a critical temperature! Remove the pot from the heat and allow the milk to cool down to 105-115°F (40-46°C). This temperature range is ideal for the starter cultures to thrive without being killed by excessive heat.
- Tip: To speed up cooling, place the pot in an ice bath (a larger bowl filled with ice water). Stir the milk gently to help it cool evenly.
- Add the Starter Culture: Once the milk is in the ideal temperature range, take a small amount of the cooled milk (about 1/2 cup) and whisk it vigorously with your chosen starter culture in a separate bowl. This helps to temper the starter and ensures it disperses evenly. Then, pour this mixture back into the main pot of milk and whisk gently but thoroughly to combine.
- Incubate: Now, it’s time to provide a warm, stable environment for the bacteria to work their magic. Pour the inoculated milk into your sterilized jars.
- If using an Instant Pot: Place the jars (without lids, or loosely covered) directly into the Instant Pot liner. Select the “Yogurt” function and set the time (typically 8-12 hours for a thicker, tangier yogurt).
- If using a Dedicated Yogurt Maker: Place the jars into the maker and turn it on. Follow the manufacturer’s instructions for timing.
- If using the Stovetop/Insulated Method: Place the lidded jars into an insulated cooler, wrap them in towels, and close the lid. Or, place them in a turned-off oven with just the light on (which provides enough residual heat). Maintain the temperature for 8-12 hours.
The longer the incubation, the tangier and often thicker your yogurt will be.
- Chill: Once incubation is complete, remove the jars and immediately transfer them to the refrigerator. Chill for at least 4-6 hours, or preferably overnight, before serving. This step stops the fermentation process and allows the yogurt to firm up further.
Troubleshooting Common Issues:
- Too Thin:
- Did the milk cool too much before adding the starter?
- Was the incubation temperature too low or inconsistent?
- Try adding 1/4 cup of dry milk powder per 1/2 gallon of milk next time.
- Use whole milk instead of low-fat.
- Too Tangy:
- Incubated for too long. Shorten the time next batch.
- Incubation temperature was too high.
- Separated/Curdled:
- Milk was heated too quickly or scorched.
- Incubation temperature was too high, causing the proteins to separate.
Beyond the Basic: Flavoring and Storing Your Homemade Delights
Once you’ve mastered the basic plain yogurt, a world of culinary creativity opens up! Homemade yogurt is a blank canvas for delicious additions.
Flavoring Your Yogurt:
Always flavor your yogurt *after* it has chilled and set. Adding fruits or sweeteners during fermentation can interfere with the bacterial activity.
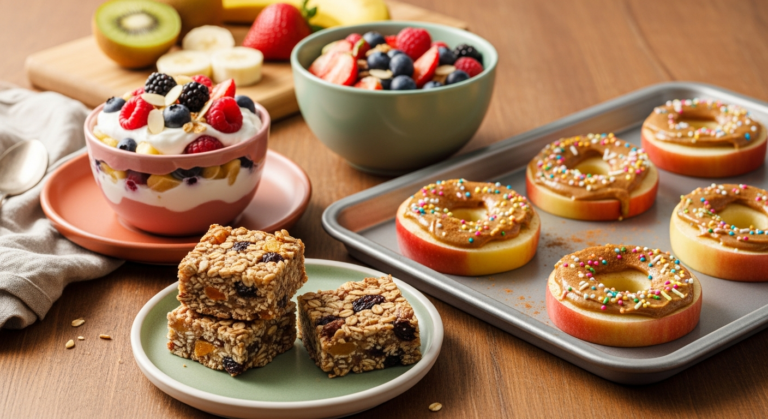
- Fresh Fruits: Berries, peaches, mangoes, bananas – chop them up and stir them in.
- Fruit Compotes or Jams: Gently cook down fruits with a touch of sugar for a more intense flavor.
- Honey or Maple Syrup: Natural sweeteners to taste.
- Vanilla Extract: A dash of pure vanilla extract adds a lovely aroma and subtle sweetness.
- Spices: Cinnamon, cardamom, or a pinch of nutmeg can elevate your yogurt.
- Citrus Zest: A little lemon or orange zest brightens the flavor.
- Granola and Nuts: For added crunch and protein.
Making Greek Yogurt:
To transform your plain yogurt into thick, luscious Greek yogurt, you simply need to strain it. After your yogurt has chilled in the refrigerator for at least 6 hours, follow these steps:
- Place a fine-mesh strainer over a large bowl.
- Line the strainer with 2-3 layers of cheesecloth or a clean nut milk bag.
- Pour the chilled yogurt into the lined strainer.
- Cover the top loosely with plastic wrap or a plate.
- Refrigerate for 2-4 hours (or longer for extra thick yogurt). The whey will drain into the bowl below.
- The longer you strain, the thicker your Greek yogurt will be. Save the whey! It’s rich in probiotics and can be used in smoothies, baking, or even to water plants.
Storing Your Homemade Yogurt:
Store your plain homemade yogurt in airtight containers in the refrigerator for up to 2 weeks. If you’ve added fresh fruit, it’s best to consume it within 5-7 days, as the fruit can shorten its shelf life. Always use clean utensils to scoop out yogurt to maintain its freshness.
Integrating Homemade Yogurt into Your Home & Lifestyle
Homemade yogurt isn’t just a healthy snack; it’s a versatile ingredient that can elevate countless dishes and truly integrate into a wholesome home lifestyle. Think of it as a cornerstone of mindful eating and culinary creativity.
Beyond the Breakfast Bowl:
- Smoothie Powerhouse: Blend with your favorite fruits, a handful of spinach, and a splash of milk for a nutritious breakfast or snack.
- Healthy Dressings and Dips: Replace mayonnaise or sour cream in recipes with plain yogurt for a lighter, tangier alternative. Think creamy ranch, tzatziki, or a simple herb dip.
- Marinades: The acidity in yogurt is fantastic for tenderizing meats, especially chicken and lamb. It also imparts a lovely flavor.
- Baking: Use it in muffins, quick breads, or cakes for added moisture and a tender crumb. It can often replace buttermilk or sour cream.
- Savory Dishes: Dollop a spoonful onto chili, curries, or roasted vegetables for a cooling, creamy contrast.
- Desserts: Create parfaits with layers of fruit and granola, or make a simple frozen yogurt.
A Mindful Kitchen Practice:
Making yogurt is more than just following a recipe; it’s an experience that encourages patience, observation, and appreciation for the natural world. As you watch the milk transform, you connect with the rhythms of fermentation, a process as old as time itself. This practice can be incredibly grounding and satisfying, bringing a quiet joy to your kitchen.
Consider involving your family, especially children, in the process. From helping to stir the milk to carefully pouring it into jars, it’s a wonderful way to teach about food, science, and the rewards of creating something with your own hands. It transforms a simple ingredient into a shared experience, enriching the heart of your home.
Key Takeaways
- Homemade yogurt offers superior flavor, probiotic benefits, ingredient control, and significant cost savings compared to store-bought options.
- Essential equipment includes a heavy-bottomed pot, an accurate thermometer, and clean jars, with options like an Instant Pot or dedicated yogurt maker offering convenience.
- The total initial equipment cost can range from $30 for basic methods to over $200 for advanced setups, but ingredient costs are consistently low.
- The yogurt-making process involves precise temperature control for heating milk to 180°F, cooling it to 105-115°F, inoculating with a starter, and incubating for 8-12 hours.
- Homemade yogurt is incredibly versatile, perfect for breakfast, dressings, marinades, and baking, and integrates beautifully into a mindful home and lifestyle.
Frequently Asked Questions
Q: Can I use non-dairy milk to make yogurt with the same equipment?
A: While the incubation equipment (Instant Pot, yogurt maker) can be the same, making non-dairy yogurt requires specific non-dairy starter cultures and often additional thickeners (like agar-agar or tapioca starch) because plant-based milks lack the natural proteins that curdle in dairy milk. The process for heating and cooling the milk would be similar, but the fermentation and setting might differ significantly.
Q: How do I know if my homemade yogurt has gone bad?
A: Fresh homemade yogurt should have a pleasant, tangy aroma and a smooth, creamy texture. Signs of spoilage include a strong, unpleasant sour smell (beyond normal yogurt tang), visible mold (any color), pink or orange streaks, or a very watery, separated consistency that wasn’t intended (e.g., if you weren’t making Greek yogurt). When in doubt, it’s best to discard it.
Q: Can I re-use a small amount of my homemade yogurt as a starter for the next batch?
A: Yes, absolutely! This is a common and economical practice, especially with fresh, active cultures. Just reserve a few tablespoons from your current batch before flavoring it, and use it to inoculate your next batch of milk. You can usually do this for several generations, but eventually, the cultures may weaken, and you might need to refresh with a new store-bought starter or freeze-dried culture.
Q: What if my yogurt doesn’t thicken after incubation?
A: Several factors can lead to thin yogurt. The most common reasons are: the milk was too hot when the starter was added (killing the bacteria), the milk was too cold (bacteria didn’t activate), the incubation temperature was inconsistent or too low, or your starter culture wasn’t active enough. Try using whole milk, adding a tablespoon or two of milk powder, ensuring precise temperatures with a good thermometer, and using a fresh, active starter for your next attempt.
Q: What can I do with the leftover whey from making Greek yogurt?
A: Don’t discard that whey! It’s a nutritional powerhouse. You can use it in smoothies for an extra protein and probiotic boost, substitute it for water or milk in baking recipes (like bread or pancakes), use it to cook grains like rice or quinoa, ferment vegetables, or even add it to your pet’s food. It’s a fantastic ingredient that embodies the zero-waste philosophy.
Making yogurt at home is more than just a recipe; it’s a delightful journey into creating wholesome, nourishing food for yourself and your loved ones. It’s an act of self-care, a nod to traditional culinary arts, and a beautiful way to bring a sense of accomplishment and fresh flavors into your daily routine. With the right equipment, a clear understanding of the process, and a dash of patience, you’ll soon be enjoying bowls of creamy, personalized yogurt that truly elevate your home cooking. Embrace the warmth and satisfaction of this simple yet profound kitchen endeavor, and savor every spoonful of your homemade success.
Article by Eleanor Vance, a passionate home cook and advocate for mindful living and accessible culinary arts. Inspired by the joy of creating beauty and nourishment within the home.


