


Mastering Natural Light: The Secret Ingredient for Stunning Home Photography
When it comes to capturing the true essence of your home and lifestyle, light isn’t just important; it’s everything. Natural light is your best friend, capable of transforming an ordinary scene into something magical. Understanding how to harness and manipulate it is one of the most crucial photography tips for stunning home and lifestyle photos.
Embrace the Golden Hour (and Beyond!)
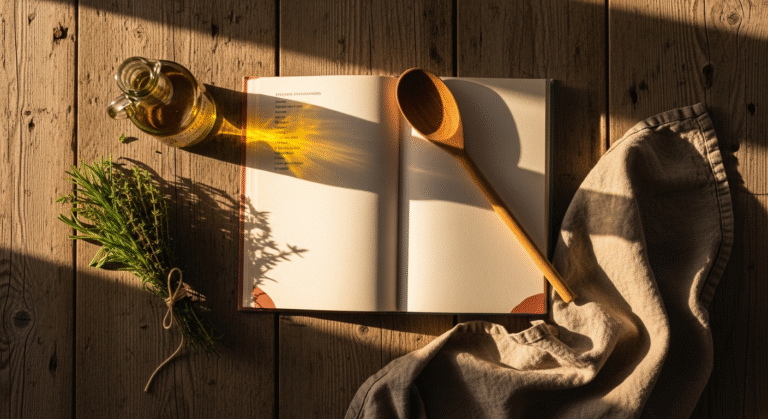
You’ve likely heard of the “golden hour” in landscape photography – that magical time just after sunrise and before sunset when the light is soft, warm, and utterly enchanting. While it’s fantastic for exteriors, it can also work wonders indoors, especially if your windows face the rising or setting sun. However, for most interior shots, you’ll want to avoid direct, harsh sunlight streaming in, which can create blown-out highlights and deep, unflattering shadows.
Instead, aim for diffused natural light. This typically occurs on slightly overcast days or when the sun isn’t directly hitting your windows. The clouds act as a giant natural diffuser, spreading the light evenly and softly. If you’re shooting on a sunny day, consider the time of day. Mid-morning to early afternoon often provides bright, consistent light without being overly harsh. Observe how light moves through your home throughout the day. You’ll quickly discover which rooms are bathed in soft, indirect light at different times – those are your prime photography spots!
Window Wisdom: Positioning is Key
Windows are your primary light source, so understanding how to use them is paramount. Position your subject (whether it’s a styled vignette, a cozy corner, or a lifestyle moment) near a window. The general rule of thumb is to have the light source coming from the side or slightly behind your subject. This creates depth, dimension, and beautiful highlights.
- Side Lighting: Positioning your subject so the light comes from the side creates lovely shadows and highlights, adding texture and interest. This is fantastic for flat lays or vignettes on a table next to a window.
- Backlighting (with caution): If the light source is directly behind your subject, you risk silhouetting. However, if managed carefully (perhaps by using a reflector or increasing exposure), backlighting can create a dreamy, ethereal glow, especially around hair or sheer fabrics.
- Front Lighting (avoid direct): Having the light directly behind you (the photographer) and shining straight onto your subject can make the scene look flat and two-dimensional. It also often means you’re blocking some of the light yourself.
To soften direct window light, consider sheer curtains. They’re a fantastic, budget-friendly way to diffuse harsh rays, creating a soft, even glow perfect for photography. Even a thin white sheet can work in a pinch!
Reflectors and Fill Light: Bouncing Your Way to Better Photos
Sometimes, even with good natural light, you might find one side of your subject is too dark, or shadows are a bit too deep. This is where reflectors come in handy. You don’t need a fancy photography reflector; a simple white foam board, a piece of white poster board, or even a white bedsheet can do the trick. Position it opposite your main light source to bounce light back onto the shadowed areas, filling them in gently and lifting the overall brightness of your image. This subtle technique can make a huge difference in the professional quality of your home photos.
Remember, the goal is to create a well-lit scene that feels natural and inviting. Experiment with different times of day and window positions in your home. You’ll be amazed at how much simply understanding and utilizing natural light can enhance your photography.
Composition Secrets: Crafting Eye-Catching Lifestyle Photography
Once you’ve mastered light, the next step in creating stunning home and lifestyle photos is understanding composition. Composition is essentially how you arrange the elements within your frame. It’s the art of guiding the viewer’s eye and telling a visual story. These photography tips will help you compose captivating scenes that draw people in.
The Rule of Thirds: Your Guiding Principle
Perhaps the most fundamental composition rule, the Rule of Thirds, is incredibly powerful. Imagine dividing your image into nine equal segments by two equally spaced horizontal lines and two equally spaced vertical lines (most cameras and phone apps have a grid overlay feature for this). Instead of placing your main subject dead center, position it along these lines or, even better, at the intersection points. This creates a more dynamic and visually appealing image than a perfectly centered shot. For instance, if you’re photographing a beautiful vase on a console table, place the vase off-center, perhaps on one of the vertical lines, with the console table extending along a horizontal line.
Leading Lines and Negative Space: Guiding the Eye
Leading Lines: Look for natural lines in your environment that draw the viewer’s eye towards your main subject or deeper into the scene. This could be a pathway, a fence, a row of books, the edge of a table, or even the pattern in a rug. Using leading lines adds depth and movement to your home and lifestyle photos.
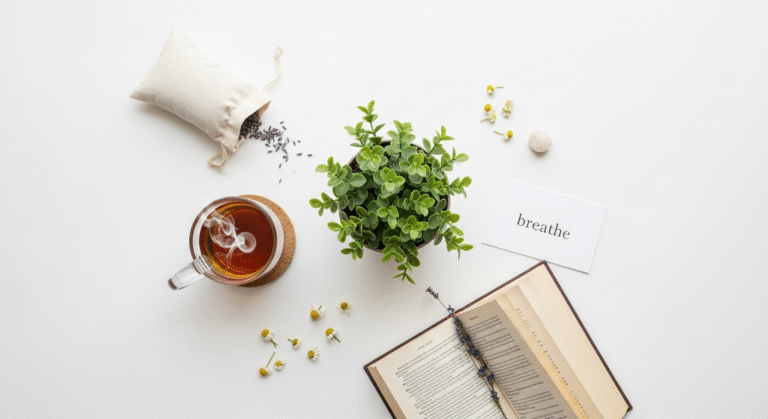
Negative Space: This refers to the empty or uncluttered areas around and between your main subjects. Don’t be afraid of it! Negative space gives your subject room to breathe, prevents the image from feeling cluttered, and can create a sense of calm and sophistication. Think of a single beautiful plant against a plain wall, or a cozy mug of tea on an otherwise clear tabletop. It allows the viewer to focus on what truly matters.
Vignettes, Flat Lays, and Storytelling Shots
Different types of shots require different compositional approaches:
- Vignettes: These are styled mini-scenes within your home, like a collection of objects on a bookshelf, a corner with an armchair and a side table, or a beautifully arranged coffee table. For vignettes, focus on creating balance and visual interest. Use the Rule of Thirds, vary heights and textures, and ensure there’s a clear focal point. These are perfect for showcasing your Cozy Home Aesthetic Ideas.
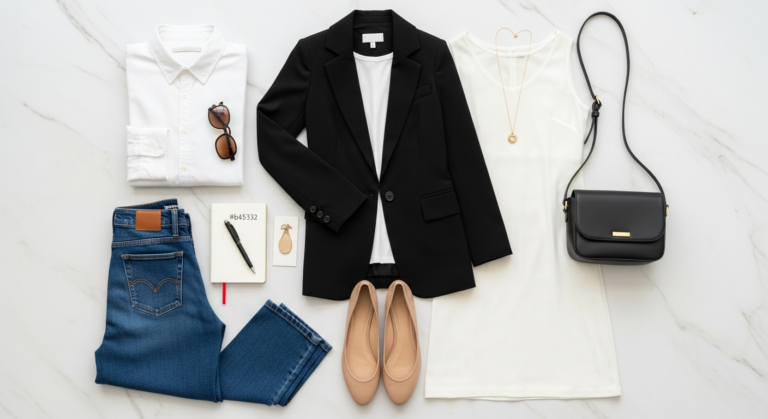
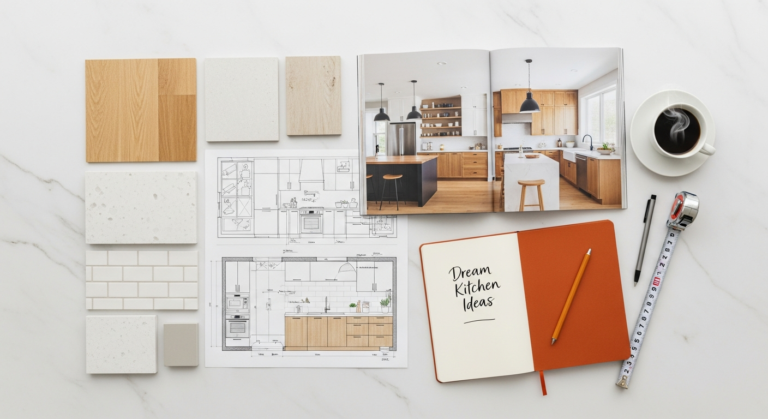
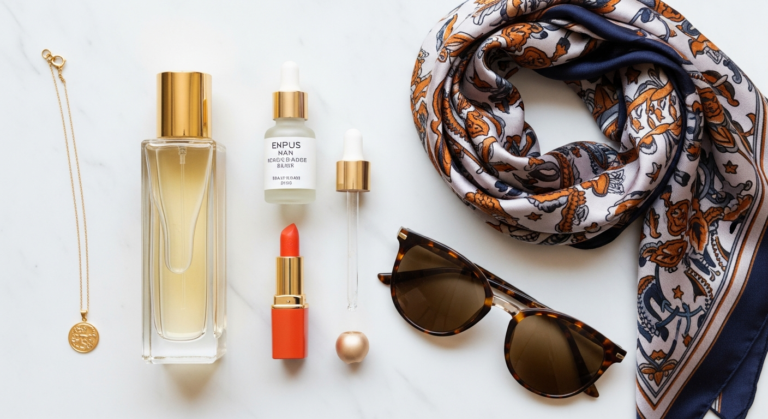
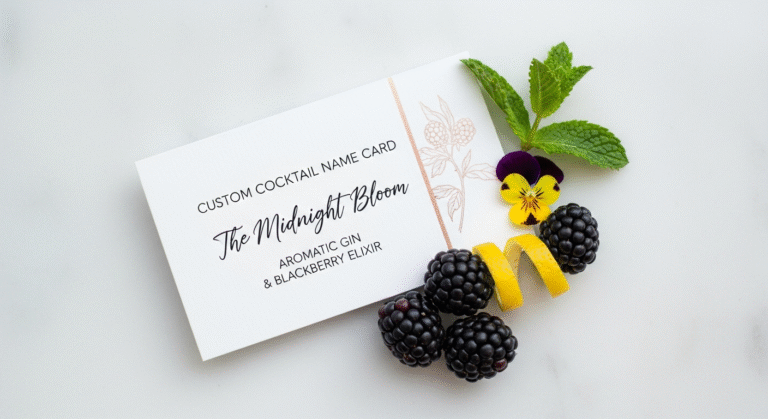
- Flat Lays: Popular for food, fashion, and product shots, flat lays are taken directly from above, looking down on an arrangement of items. The key here is organization and storytelling. Arrange items in a visually pleasing way, ensuring good spacing and a clear narrative. Use complementary colors and textures.
- Storytelling Shots: These are dynamic and often include a human element or imply an activity. Instead of just a static shot of a bed, show a hand reaching for a morning coffee. Instead of just a kitchen island, show ingredients being prepped. These shots aim to evoke emotion and give a glimpse into a lived-in moment. Think about the “who, what, when, where, why” of the scene you’re trying to capture.
When composing your shots, always take a moment to look through your viewfinder or screen and ask yourself: What am I trying to show? What’s the most important element? How can I arrange things to make it most appealing? Practice and experimentation are your best teachers here. The more you consciously compose, the more intuitive it will become.
Styling Your Scenes: The Art of Home Decor Photography
Before you even click the shutter, the magic of stunning home and lifestyle photos often begins with thoughtful styling. Photography tips for home decor are as much about arranging your space as they are about camera settings. A beautifully styled scene is half the battle won, allowing your camera to capture the inherent beauty you’ve created.
Declutter, Declutter, Declutter!
This is perhaps the most critical styling tip. A cluttered space instantly distracts the eye and makes even the most beautiful items look messy. Before you start shooting, take a few minutes to remove anything that doesn’t contribute to the story or aesthetic of your shot. This includes stray papers, remote controls, chargers, excessive personal items, or anything that clashes with your desired look. Think of it as creating a clean canvas for your masterpiece. You’ll be amazed at how much more impactful your photos become when the scene is tidy and intentional.
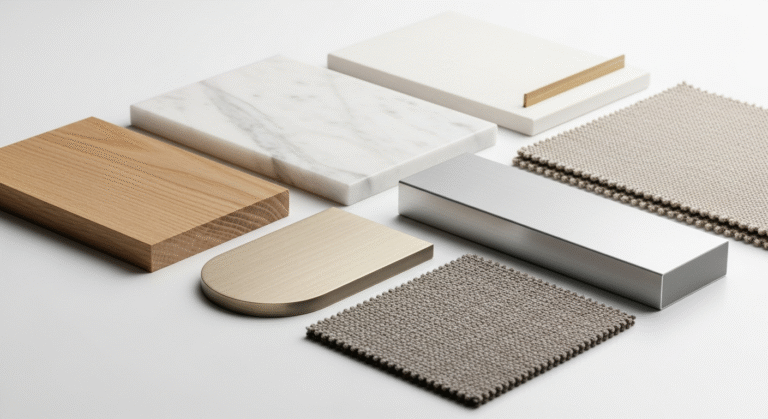
Add Texture, Layers, and Visual Interest
Homogeneous, flat scenes rarely make for interesting photos. Introduce texture and layers to create depth and warmth. Think about:
- Textiles: A chunky knit throw draped over a sofa, a plush rug on the floor, linen curtains, or decorative pillows can add incredible tactile appeal.
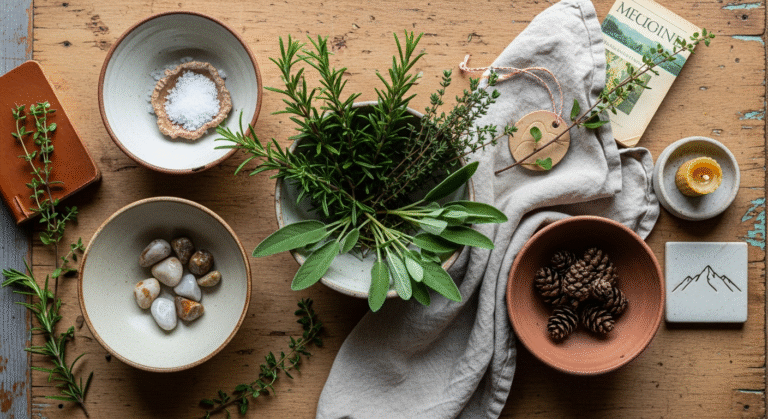
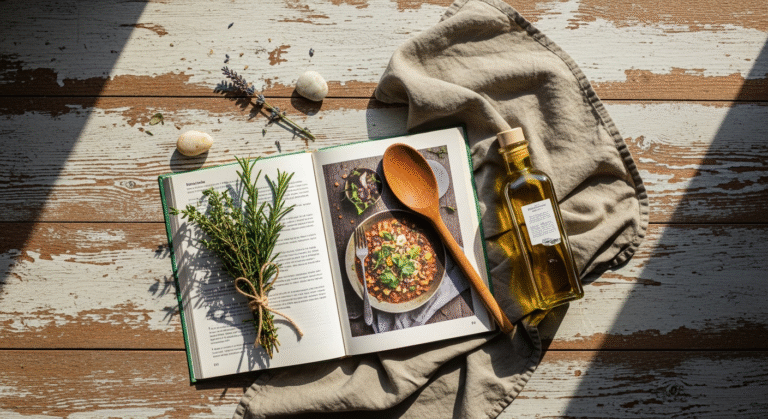
- Natural Elements: Fresh flowers, a bowl of fruit, a branch in a vase, or a wooden tray instantly bring life and organic texture to a scene. Consider the seasonality – a vase of peonies in spring, a bowl of apples in autumn.
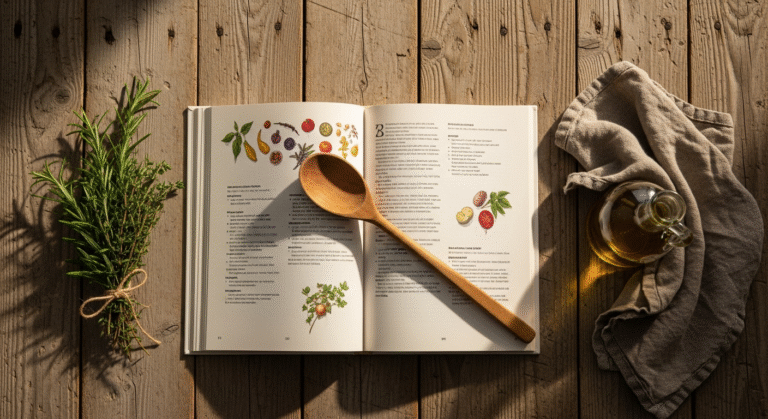
- Books & Magazines: Stacked art books or lifestyle magazines can add a sophisticated touch and a hint of personality.
- Trays & Baskets: Use these to corral smaller items, creating a sense of organization and adding another layer of texture. A beautiful woven basket holding extra blankets contributes to a cozy vibe.
- Vary Heights: When styling a shelf or tabletop, arrange items at different heights to create visual flow and prevent a flat appearance. Use pedestals, stacked books, or varying sizes of objects.
These elements are fantastic for achieving that coveted Cozy Home Aesthetic Ideas, which translates beautifully into photographs.
Curate Your Color Palette and Props
Consider the overall color palette of your scene. Do the colors complement each other? Are they harmonious? Sometimes a pop of contrasting color can be exciting, but generally, sticking to a cohesive palette (even if it’s neutrals with a few accent colors) makes for a more polished photograph. For example, if your living room has a calm, neutral base, a vibrant throw pillow or a colorful bouquet can become a delightful focal point.
Props are your storytelling tools. They help set the mood and provide context. Think about what activity might happen in the space you’re photographing:
- Living Room: A half-read book, a warm mug, a cozy blanket, fresh flowers, a decorative candle.
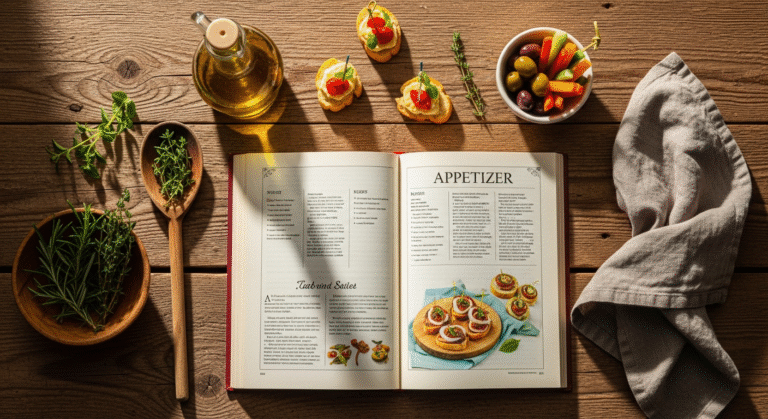
- Kitchen: A beautifully styled cutting board with fresh produce, a ceramic mug, a stack of homemade cookies, a vintage cookbook.
- Bedroom: Fluffy pillows, a draped throw, a bedside carafe with water and a glass, a small stack of books.
Choose props that are authentic to your style and enhance the scene without overwhelming it. Sometimes, less is truly more. A simple, well-chosen prop can speak volumes.
Remember, styling is an iterative process. Arrange, step back, look through your camera, adjust, and repeat. What looks good to the naked eye might need tweaking when viewed through a lens. These deliberate styling choices are what truly make your home decor photography shine and elevate them to stunning home and lifestyle photos.
Essential Gear and Settings for Stunning Photography (Even with Your Phone!)
While natural light and thoughtful composition are paramount, having a grasp of your gear and basic settings can significantly enhance the quality of your stunning home and lifestyle photos. The good news? You don’t need to break the bank for professional results; your smartphone is a powerful tool!
Your Camera Choice: DSLR/Mirrorless vs. Smartphone
DSLR or Mirrorless Cameras: If you’re serious about photography, these cameras offer unparalleled control over settings like aperture, shutter speed, and ISO, leading to superior image quality, especially in low light. They also allow for interchangeable lenses, which can open up a world of creative possibilities (e.g., a wide-angle lens for interiors, a prime lens for beautiful bokeh). Brands like Canon, Nikon, Sony, and Fujifilm offer excellent options at various price points.
Smartphones: For most lifestyle bloggers and enthusiasts, modern smartphones are incredibly capable. Their computational photography features can often mimic effects previously only possible with dedicated cameras. The convenience of having a high-quality camera always in your pocket is undeniable. iPhones, Google Pixels, and Samsung Galaxies are known for their excellent camera systems.
Basic Camera Settings Explained (Simplified for Home Photography)
Understanding these three pillars of photography will give you more control, regardless of your camera type:
- Aperture (f-stop): Controls how much light enters the lens AND the depth of field (how much of your image is in focus). A low f-number (e.g., f/1.8, f/2.8) means a wide-open aperture, letting in more light and creating a shallow depth of field (blurry background, sharp subject – often called “bokeh”). A high f-number (e.g., f/8, f/11) means a narrower aperture, less light, and more of the scene in focus. For dreamy lifestyle shots with blurred backgrounds, aim for a lower f-stop. For wider interior shots where you want everything sharp, use a higher f-stop.
- Shutter Speed: Controls how long the camera’s shutter stays open, letting light hit the sensor. A fast shutter speed (e.g., 1/500 sec) freezes motion (great for pets or active lifestyle shots). A slow shutter speed (e.g., 1/30 sec or slower) lets in more light but can cause blur if there’s movement (including camera shake). For static home photos, you can often use a slower shutter speed, especially if your camera is on a tripod.
- ISO: Measures your camera’s sensitivity to light. A low ISO (e.g., 100, 200) produces cleaner images with less “noise” (graininess) and is ideal in bright conditions. A high ISO (e.g., 1600, 3200) makes the sensor more sensitive, allowing you to shoot in dimmer light, but at the cost of increased noise. Always try to keep your ISO as low as possible for the cleanest home and lifestyle photos.
Smartphone Specifics: While smartphones adjust these automatically, many now offer a “Pro” or “Manual” mode that lets you tweak these settings. Additionally, features like “Portrait Mode” on iPhones or “Live Focus” on Samsung phones simulate a shallow depth of field for that lovely blurry background effect, perfect for close-up lifestyle shots or styled vignettes.
Essential Accessories for Sharper, Better Photos
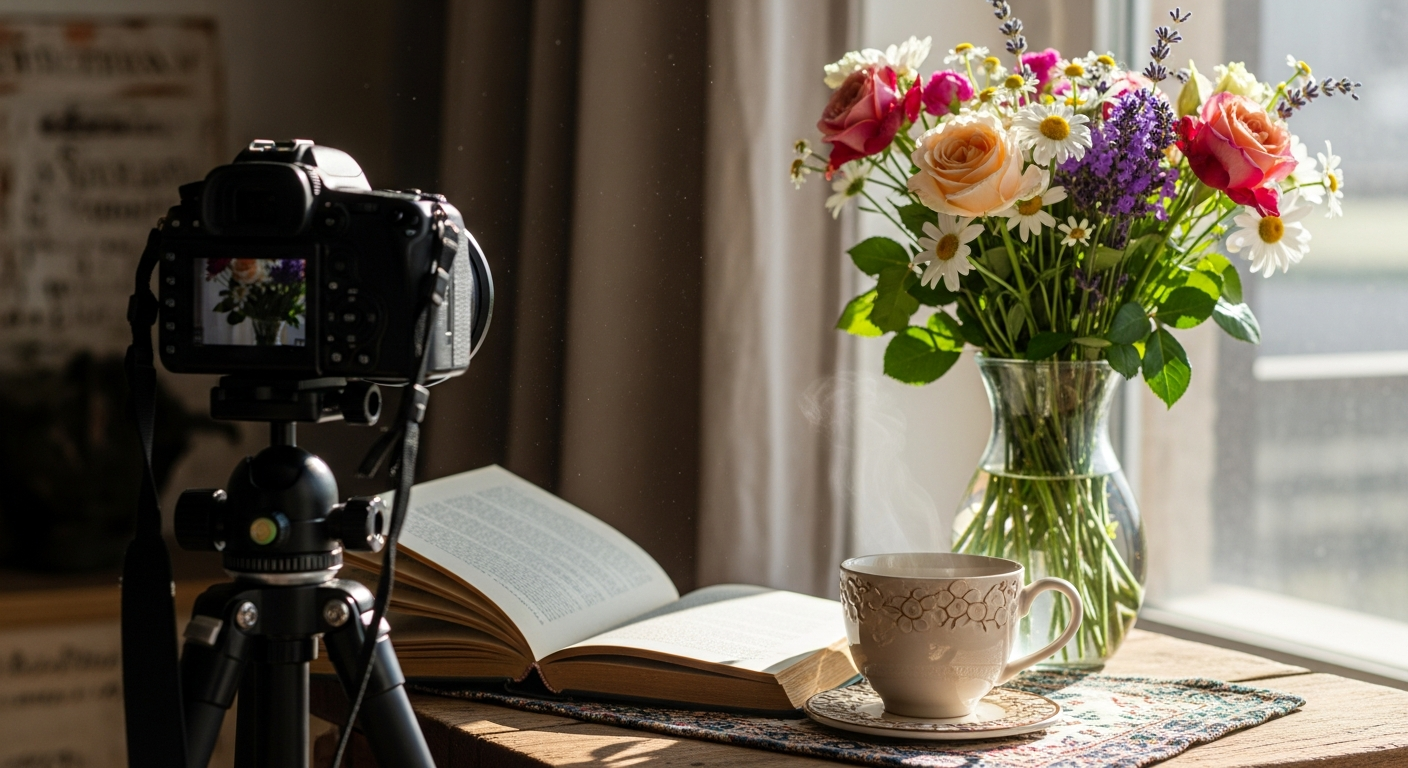
- Tripod: A game-changer for interior photography! A tripod keeps your camera perfectly still, allowing you to use slower shutter speeds in lower light without blur. This is crucial for sharp, detailed shots of your home. A small flexible tripod like a Joby Gorillapod can even hold your phone for flat lays or self-timer shots.
- Remote Shutter Release: If using a tripod, a remote shutter (or your camera’s self-timer) prevents camera shake from pressing the shutter button, ensuring maximum sharpness. Many phone cameras have a timer function too.
- Reflectors: As mentioned earlier, white foam boards are invaluable for bouncing light and filling shadows.
- Lens Wipes: A smudged lens is the enemy of sharp photos. Keep a microfiber cloth handy for both your phone and camera lenses.
Don’t be intimidated by the technical jargon. Start by experimenting with one setting at a time, and you’ll quickly see the impact it has on your stunning home and lifestyle photos.
Editing Your Home & Lifestyle Photos to Perfection
Once you’ve captured your raw images, the journey to stunning home and lifestyle photos isn’t quite over. Editing is where you refine, enhance, and bring out the true potential of your shots, ensuring they match the vision you had when you clicked the shutter. Think of it as putting the finishing touches on a beautiful painting.
The Golden Rule of Editing: Enhance, Don’t Over-Process
The goal of editing is to make your photos look their best, not to transform them into something artificial. Strive for a natural, clean, and inviting aesthetic. Over-saturating colors, applying too many filters, or drastically altering exposure can make your photos look fake or dated. Aim for subtle adjustments that brighten, clarify, and harmonize your images.
Key Editing Adjustments to Master
Most editing software and apps offer a similar suite of tools. Focus on these core adjustments:
- Exposure/Brightness: This is your first stop. Adjust to ensure your photo isn’t too dark or too bright. Aim for a balanced look where details are visible in both shadows and highlights.
- Contrast: This defines the difference between the light and dark areas of your photo. Increasing contrast can add “pop” and make an image more dynamic, but too much can crush shadows or blow out highlights.
- White Balance (Temperature & Tint): This corrects the color cast of your photo, making whites truly white and colors appear natural. If your photo looks too blue/cool, increase the temperature (make it warmer). If it looks too yellow/warm, decrease the temperature. Tint controls green/magenta hues. Getting white balance right is crucial for accurate home decor photography.
- Highlights & Shadows: These sliders allow you to recover detail in the brightest (highlights) and darkest (shadows) parts of your image independently, without affecting the overall exposure as much. If a window looks too bright, reduce highlights. If a corner is too dark, lift shadows.
- Clarity/Sharpness: Use these sparingly to add definition and crispness to your images. Too much can make photos look gritty or unnatural.
- Saturation & Vibrance: Saturation affects the intensity of all colors equally. Vibrance intelligently boosts muted colors while leaving already saturated colors alone, often providing a more natural-looking color boost.
- Straighten & Crop: Always ensure your horizons and vertical lines are straight. A crooked photo is instantly distracting. Cropping allows you to improve composition, remove distracting elements, and focus the viewer’s eye on your subject.
Recommended Editing Tools (Free & Paid)
- Smartphone Apps (Free/Subscription):
- Snapseed: A powerful, user-friendly, and free app from Google. It offers a wide range of professional editing tools, selective adjustments, and healing brushes. Excellent for quick, high-quality edits on the go.
- Lightroom Mobile: The free version offers robust editing features, including raw file support. If you have an Adobe Creative Cloud subscription, it syncs with your desktop version. It’s a fantastic option for more advanced mobile editing.
- VSCO: Known for its beautiful film-inspired filters, VSCO also has a solid set of editing tools.
- Desktop Software (Paid/Subscription):
- Adobe Lightroom Classic/CC: The industry standard for photo organization and non-destructive editing. It’s powerful, offers incredible control, and is perfect for managing large photo libraries.
- Adobe Photoshop: For more complex tasks like compositing, advanced retouching, or removing unwanted objects, Photoshop is unmatched.
- Capture One: An excellent alternative to Lightroom, favored by many professionals for its color grading capabilities and tethered shooting.
Developing a consistent editing style is also key for a cohesive look across your blog or social media. Once you find a look you love, try to apply similar adjustments to all your stunning home and lifestyle photos. This creates a recognizable brand aesthetic and makes your feed feel harmonious.
Creative Approaches to Lifestyle Photography: Beyond the Static Shot
While beautifully styled vignettes and perfectly composed room shots are essential for home decor photography, true lifestyle photography goes a step further. It captures life in motion, evokes emotion, and tells a deeper story. To achieve truly stunning home and lifestyle photos, you’ll want to incorporate a dynamic approach that brings your images to life.
Capturing Movement and Candid Moments
The essence of lifestyle photography is capturing authentic moments, not stiff poses. Think about how people genuinely interact with their homes and daily routines. Instead of asking someone to pose with a coffee mug, capture them in the act of stirring sugar, reaching for a book, or laughing mid-conversation. This often means being quick, observing, and anticipating moments.
- Movement: Show a hand reaching for a warm blanket, steam rising from a teacup, someone watering plants, or a child playing with toys. These small details imply activity and add a sense of realness.
- Candidness: Don’t always direct your subjects. Give them a task or allow them to simply exist in the space, then quietly observe and shoot. The most genuine expressions and interactions often happen when people forget they’re being photographed.
- Behind-the-Scenes: Sometimes, showing the “making of” a moment can be just as engaging. A messy flour-dusted countertop before the final baked goods are presented, or a pile of fabrics before a sewing project.
Incorporating People and Pets Naturally
People and pets instantly add warmth, scale, and relatability to home photos. They transform a static scene into a lived-in space. However, the key is to incorporate them naturally, making them part of the overall story rather than just an addition.
- Human Element: A hand reaching for a book on a shelf, feet tucked under a cozy blanket, someone reading in an armchair, or a blurred figure walking through a doorway. These glimpses suggest presence without necessarily showing a full face, maintaining an aspirational feel while adding human connection.
- Pets: Our furry friends are natural lifestyle models! Capture them sleeping curled up on a sofa, looking out a window, or playing with a favorite toy. Their presence adds charm and a touch of personality that resonates with many.
- Interaction: Encourage interaction with the space. Someone admiring a Gallery Wall Ideas for Living Room, a child drawing at a kitchen island, or a couple enjoying a meal together. These interactions are what truly define “lifestyle.”
Storytelling Through a Series of Photos
One single photo is powerful, but a series of photos can tell a much richer story. Think about creating a visual narrative:
- The Morning Routine: Start with a shot of soft morning light, then a close-up of a coffee maker brewing, a hand holding a warm mug, and finally, someone enjoying their coffee by a window.
- A Styled Corner: Begin with a wider shot of the entire vignette, then move in for close-ups of specific details like a textured throw, a stack of books, or a unique decorative object.
- Before & After: Document a small refresh or a DIY project. Show the “before” (perhaps a bit messy or plain) and then the “after” with your beautiful styling.
By thinking in terms of sequences and narratives, you’ll find new opportunities to capture stunning home and lifestyle photos that are not only beautiful but also deeply engaging and relatable. Remember to always seek out the authenticity and the story within your everyday moments.
Budget-Friendly Photography Hacks for Your Home
You don’t need a professional studio or expensive gear to achieve stunning home and lifestyle photos. Many of the most impactful photography tips are surprisingly budget-friendly, aligning perfectly with Home Decor Ideas on a Budget principles. Here’s how to get professional-looking results without breaking the bank.
DIY Reflectors and Diffusers
As discussed, natural light is your best friend. To make the most of it, you can create your own reflectors and diffusers:
- Reflectors: A large white foam board from a craft store (often just a few dollars) is an excellent reflector. Use it to bounce light into shadowy areas. For warmer light, you can even use a piece of gold-colored cardstock. Aluminum foil crinkled and then smoothed out over cardboard can create a harsher, more direct bounce if needed, but white is generally preferred for softer light.
- Diffusers: Sheer white curtains are fantastic for diffusing harsh window light. If you don’t have them, a thin white bedsheet or even a large piece of white tissue paper taped over a window can work wonders to soften direct sunlight.
These simple tools allow you to control light like a pro for very little cost.
Utilize Everyday Household Items as Props and Backdrops
Before you rush to buy new props, look around your home with fresh eyes. Many everyday items can be transformed into beautiful photographic elements:
- Backdrops: A plain white wall, a textured blanket, a wooden cutting board, a simple sheet of poster board, or even a neatly ironed linen tablecloth can serve as excellent backdrops for flat lays or product shots. Look for surfaces with interesting textures or neutral colors.
- Props: Your favorite coffee mugs, a stack of well-loved books, fresh produce from your kitchen, a beautiful plant, a cozy throw blanket, or a vase of flowers from your garden. These items add authenticity and character to your photos. The key is to select items that fit your aesthetic and tell a story, making them perfect for stunning home and lifestyle photos.
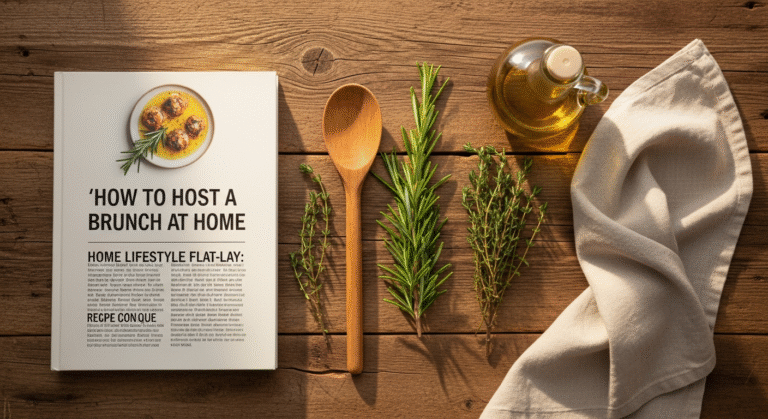
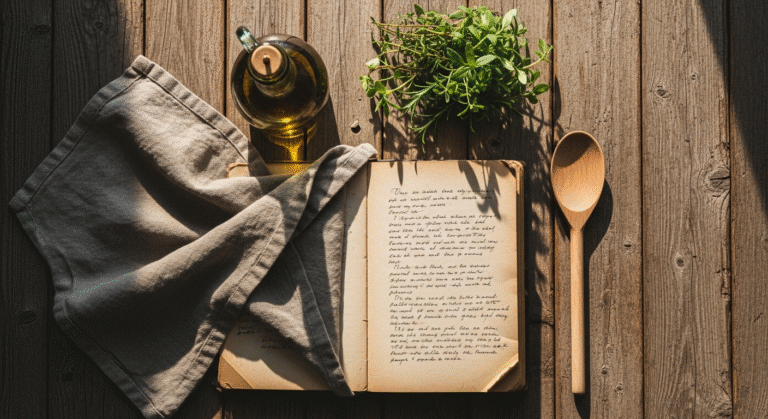
- Surfaces: A rustic wooden table, a marble countertop, a vintage tray, or even a clean floor with interesting tile can be the perfect base for your styled scenes.
The trick is to declutter and arrange them thoughtfully, as if they were purchased specifically for the shoot.
Free (or Affordable) Editing Software and Apps
You absolutely don’t need expensive Adobe subscriptions to edit your photos beautifully. There are many fantastic free and low-cost options:
- Snapseed (Free): As mentioned, this Google app is incredibly powerful for mobile editing, offering precise control over exposure, color, selective adjustments, and more.
- Lightroom Mobile (Free with Basic Features): The free version provides excellent editing capabilities, including adjustments for light, color, effects, and geometry.
- GIMP (Free Desktop): A free, open-source alternative to Photoshop for desktop users, offering a wide range of image manipulation tools. It has a steeper learning curve but is incredibly powerful.
- Canva (Free/Paid Subscription): While primarily a graphic design tool, Canva also offers basic photo editing features and is great for adding text or creating collages for your blog or social media.
Investing time in learning one of these free tools will yield far greater results than buying expensive software you don’t know how to use. Practice editing consistently to develop your unique style for stunning home and lifestyle photos.
Utilize Your Smartphone to its Full Potential
Modern smartphones are incredible cameras. Don’t underestimate them!
- Grid Lines: Turn on the grid lines in your camera settings to help you compose using the Rule of Thirds.
- Portrait Mode: Use this feature (if your phone has it) to create that beautiful blurred background effect for close-ups of specific items or styled vignettes.
- Burst Mode: For capturing pets or children in motion, burst mode allows you to take many photos in quick succession, increasing your chances of getting that perfect candid shot.
- Clean Your Lens: This is a simple but often overlooked step! A smudged phone lens will result in blurry, hazy photos. Always wipe your lens with a microfiber cloth before shooting.
By implementing these budget-friendly photography tips, you can achieve stunning home and lifestyle photos that look professionally styled and edited, all while staying true to your savvy, resourceful approach to home and living.
There you have it, dear friends! A comprehensive guide to transforming your photography skills and capturing the beauty of your home and everyday life. From harnessing the magic of natural light to carefully composing your shots, styling your scenes with intention, understanding your gear, and refining your images through editing, each step plays a vital role in creating truly stunning home and lifestyle photos. Remember, practice makes perfect. Don’t be afraid to experiment, try new angles, and revisit the same scene at different times of day. Your unique perspective and personal style are what will make your photos truly yours. We hope these photography tips empower you to document your beautiful world with confidence and creativity. Happy snapping!
Frequently Asked Questions
Q: What’s the single most important tip for improving home and lifestyle photos?
A: Without a doubt, it’s mastering natural light. Learning to position your subjects near windows, diffuse harsh light, and utilize reflectors will instantly elevate the quality and mood of your stunning home and lifestyle photos more than any other single factor.
Q: I only have my smartphone. Can I still take professional-looking home photos?
A: Absolutely! Modern smartphones are incredibly powerful. Focus on good natural light, thoughtful composition (using grid lines), careful styling, and smart editing with free apps like Snapseed or Lightroom Mobile. Many stunning home and lifestyle photos you see online are taken with a phone!
Q: How do I make my home look less cluttered in photos, even if it’s not perfectly tidy in real life?
A: The trick is to declutter just the frame you’re shooting. Before taking a photo, quickly remove any distracting items, papers, remotes, or excess personal belongings from the immediate area you want to capture. Focus on creating a clean, intentional vignette. What’s outside the frame doesn’t matter!
Q: What are some easy ways to add a “cozy” feel to my home and lifestyle photos?
A: Incorporate soft textures like chunky knit throws, plush pillows, and sheepskin rugs. Add
Recommended Resources
You might also enjoy How To Apply Makeup For Beginners Step By Step from Sometimes Daily.
Explore Celebrity Self Tanning And Bronzing Tips for additional insights.


